At Super Speedy Plugins, we recommend 3 different hosting options depending on your personal situation. If you have the skills and the time, we recommend installing Slick Stack to get the most bang for your buck. We have a guide coming very soon for this.
On the other hand, if you are an agency, we recommend Gridpane. Like Cloudways, they provide a control panel on top of third party hosting but they also provide a white label service and tools more suited for agencies.
If you are a solo WordPress website owner however, with no regular access to a developer or system adminstrator and you don’t want to learn the intricacies of SSH then we highly recommend Cloudways.

Table of Contents
- If you like my guide, click my affiliate link
- Cloudways WordPress Hosting Stack
- Additional Benefits and Value of Cloudways WordPress Hosting
- Additional things to bear in mind if considering Cloudways
- Steps to take before migrating to Cloudways
- How to actually migrate your WordPress website to Cloudways
- Steps to take after migration
- Visual guide to migrating your WordPress website to Cloudways
- Trouble Shooting
- My Overall Opinion of Cloudways
If you like my guide, click my affiliate link
If, after reading this guide, you decide to try Cloudways then please consider visiting them through my affiliate link where I’ll earn a little money if you sign up.
I recommend them for GOOD reason and would recommend them even if they did not provide an affiliate deal. The two other hosting options I recommend are Slick Stack if you’re technically capable or Gridpane if you’re a development agency.
Cloudways WordPress Hosting Stack
The primary benefit of Cloudways hosting is the speed – their stack is very similar to my own hardcore stack builds with almost the latest versions of each piece of software in your stack provided and maintained for you. Their stack includes all the following goodies.
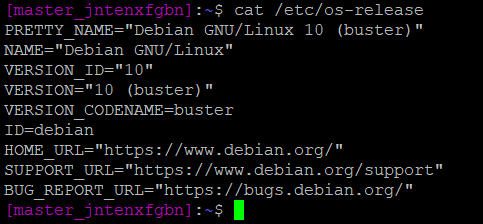
Debian Linux
I personally prefer Ubuntu because it offers the very latest packages for all of your software, but Debian is still a great choice. It’s lighter weight than Ubuntu but has slightly older packages, but at least it’s not CentOS!
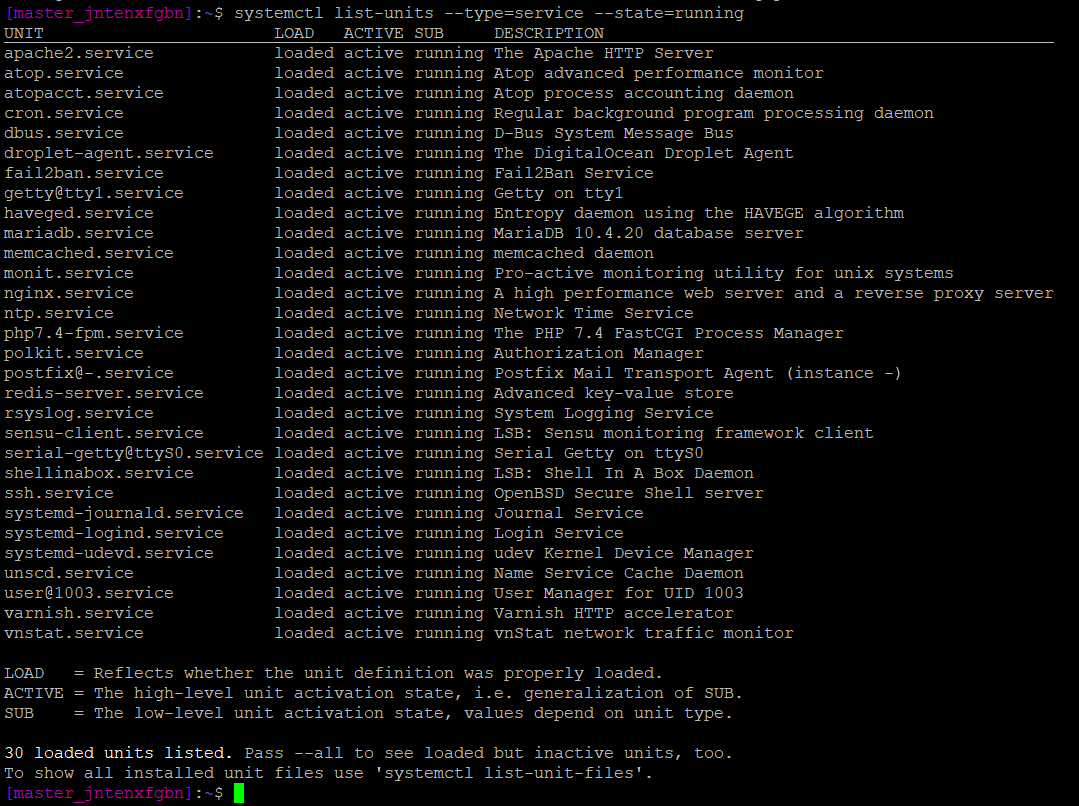
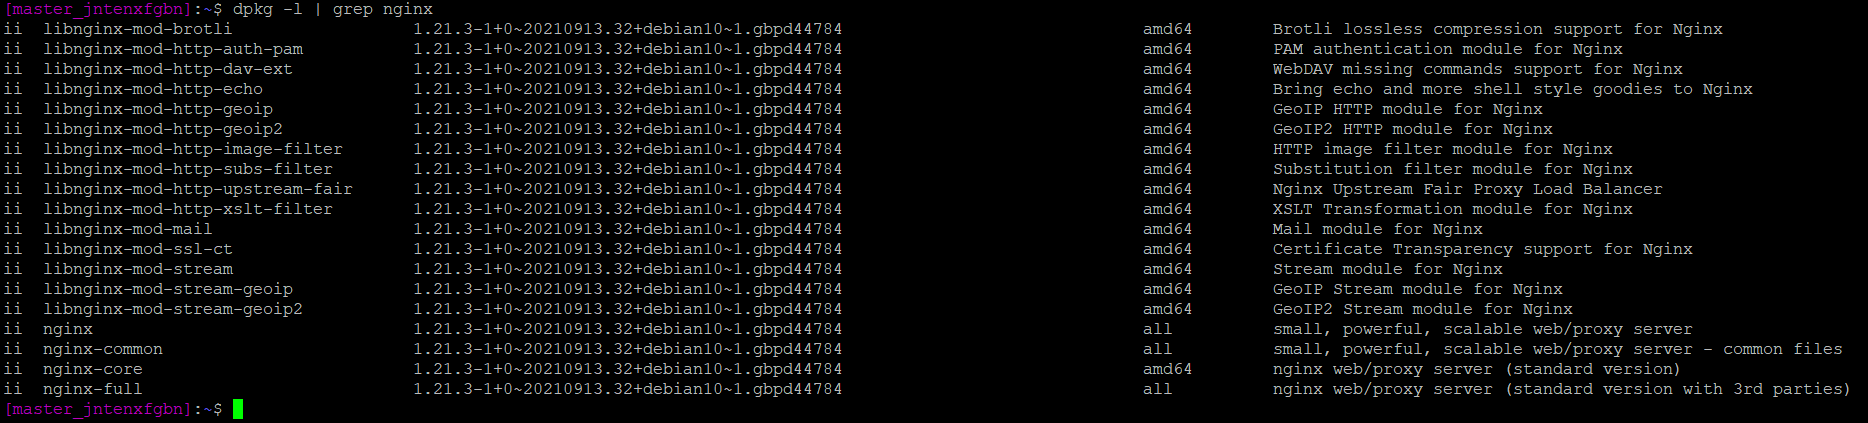
Varnish + Nginx + Apache web server
Nginx is still the best web server out there while Apache is a memory hog and Varnish is a pain to configure. Cloudways have actually sacrificed some speed here in return for the convenience of .htaccess files by including Apache in the stack. Nginx cannot use .htaccess files.
The only time I’ve ever encountered this being an issue is when it comes to your XML sitemaps. If your server is running Apache, then Yoast or Rankmath can drop a .htaccess file and your sitemaps are auto-configured. With Nginx, you need to alter your nginx configuration to get your sitemaps working. I think it’s worth this little extra one-off hassle to have the extra speed and reduced RAM consumption that comes with a pure Nginx-only stack.
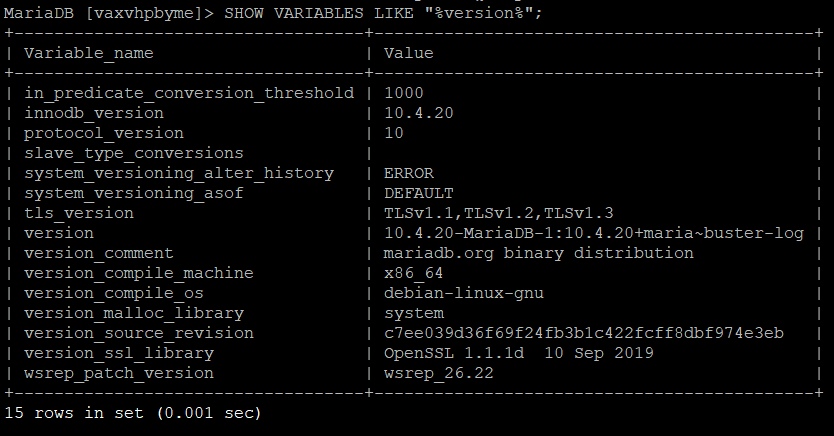
MariaDB 10.4.20
Cloudways uses MariaDB on its WordPress installation. MariaDB is not my choice for my own stack builds – I prefer MySQL 8 just because of the might of Oracle behind it, but MariaDB is on par performance-wise.
Fail2Ban
I stopped using fail2ban 2 years ago thanks to how great Cloudflare is now at stopping attacks before the traffic even touches your server. With Cloudflare, you can provide JS challenges to traffic that you think is suspect which helps even the initial hit from suspect traffic whereas with fail2ban traffic has to do something suspicious a few times.
For example, with Cloudflare WAF (their firewall), you can present a JavaScript challenge to suspicious traffic accessing your login URLs. With fail2ban, the IP address would need to try and fail to log in at least once before being bannable. With Cloudflare, you can ban the traffic even on the first attempt.
It’s not a terrible choice to use fail2ban, but really Cloudflare is just so much better for stopping bad traffic.
PHP 7.4
I’m onto PHP 8.1 on my own stacks now, but PHP 7.4 is still really good. Cloudways also give you the option of upgrading to PHP 8.1 and I understand why they have not made it the default option because there are still many plugins which are not compatible with PHP 8.
Memcached and Redis
I think Cloudways have added both of these services as a sales and marketing ploy. There’s really no need to have both running – it should be one or the other, and for single-server WordPress instances Redis should always be preferred.
Additional Benefits and Value of Cloudways WordPress Hosting
On top of their decent stack for WordPress and their hand-holding support (they will manually migrate you for free if you need it!), there are some really valuable additional benefits:
- Free migration tool – this actually works really well with my extra steps below. If you are scared of doing your own migration, they offer to do your migration for you.
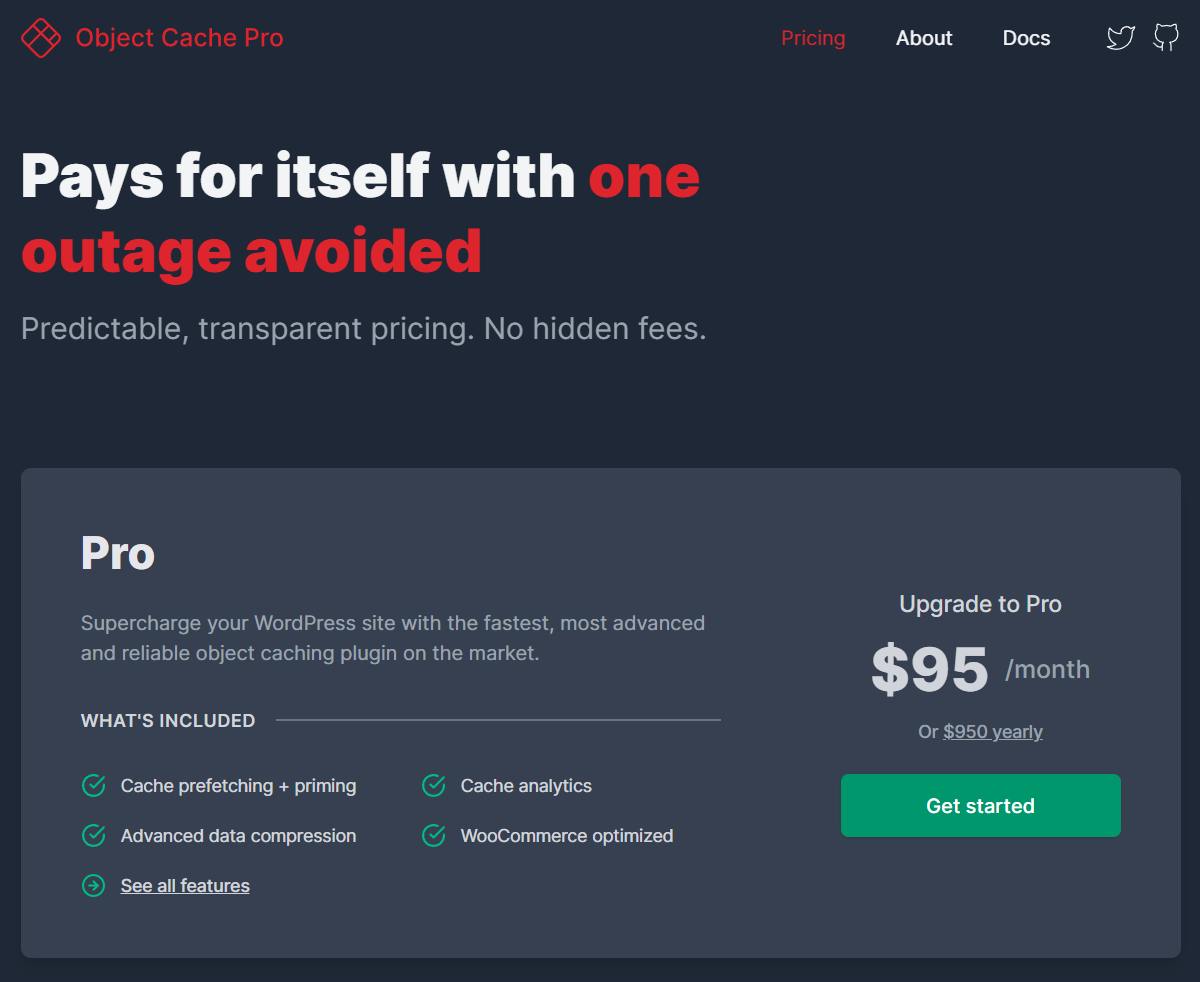
- Object Cache pro – no need to pay for this, it’s included with Cloudways as a must use plugin. This on it’s own is worth $95 per month.
- Malcare malware protection – no need for Wordfence any more. This is worth $99 per year.
- Breeze page caching plugin – you no longer need to pay for WP Rocket. This saves you $100 per year.
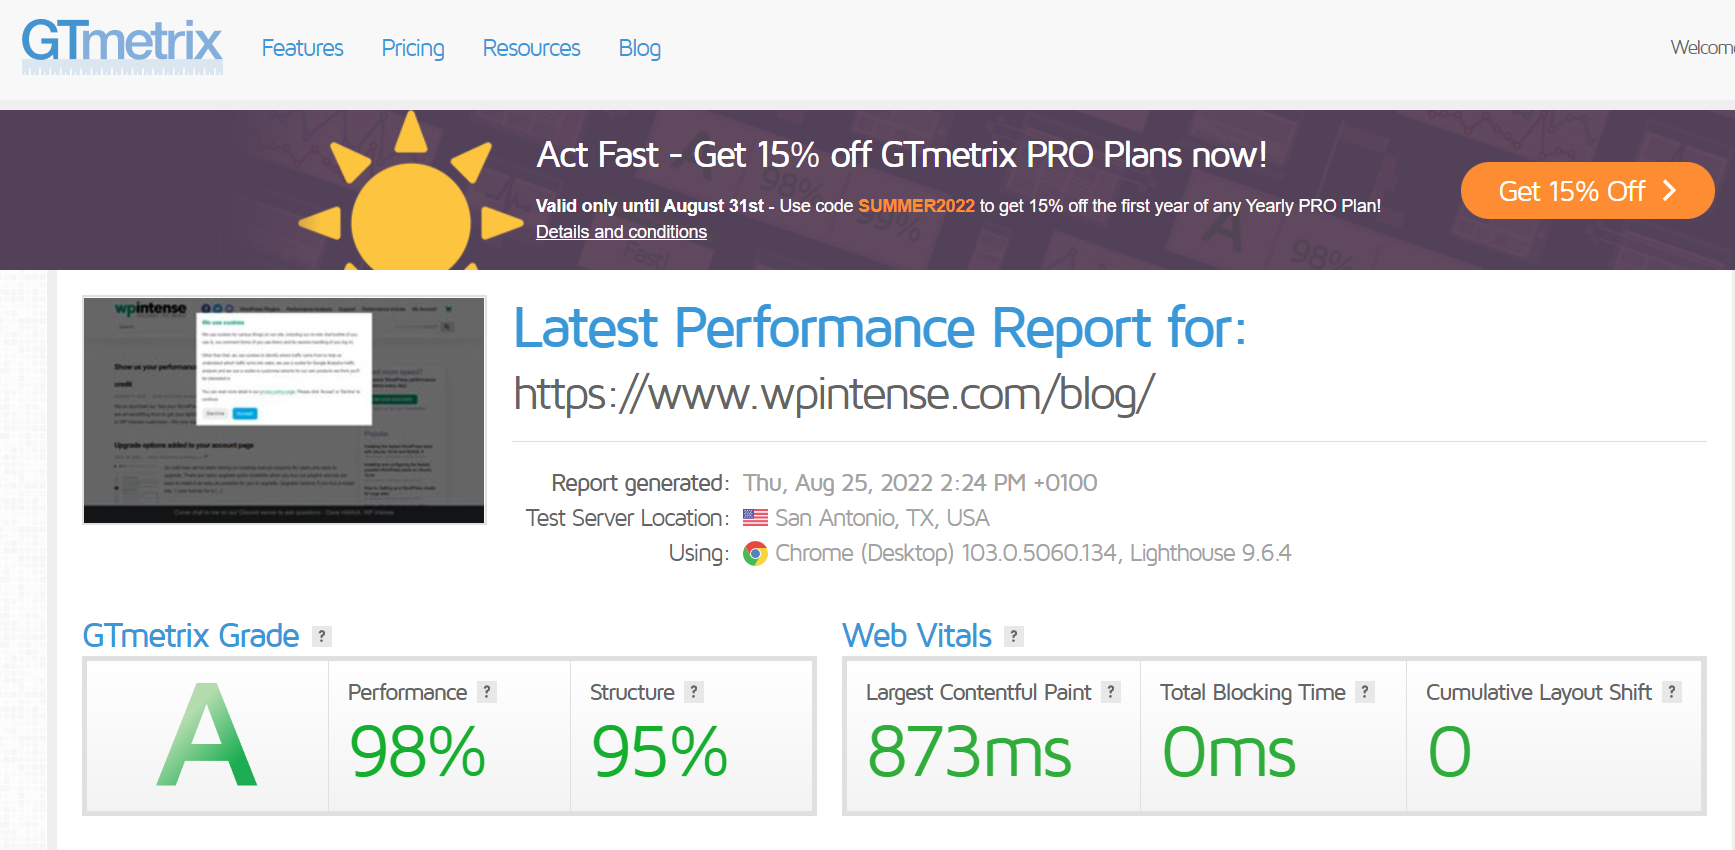
- 3 day free trial – you can perform a dry run migration without any downtime on your live site to compare the performance
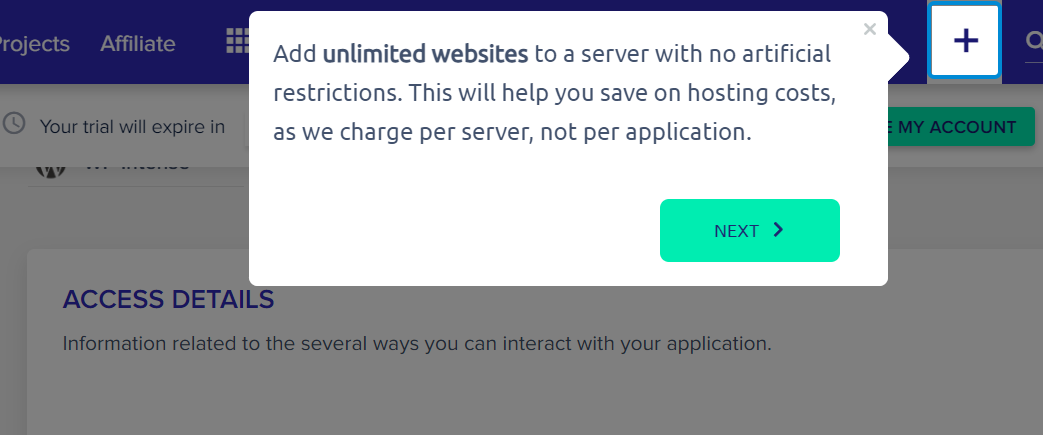
- No extra cost per website – you can add multiple websites to each server for no extra cost
- Optional Cloudflare Pro for only $4.99 per month per website – this costs $20 per month direct from Cloudflare so you’re saving $15.01 here per month.
Additional things to bear in mind if considering Cloudways
Cloudways does cost more than hosting with the likes of SlickStack on Digital Ocean but in return, you get hand-holding and someone available to help you on support. Basically, you get to forget about your hosting and focus on your business.
In addition, they were recently purchased by Digital Ocean so its theoretically possible that their service may change in the future, but then again Digital Ocean have always shown good management so I don’t personally see any worry here.
With the additional services like Redis Object Cache Pro, Malcare and the reduced-rate Cloudflare option you are saving at least $20 per month depending on how much value you put in Object Cache Pro. I’ve always found the free version of the Redis Object Cache plugin to be great enough, so long as you have the phpRedis library rather than the Predis library installed.
One big downer, for me, is that Cloudways do not give you root access to your server. They do give SSH access, but not root access so you’re limited with how much you can mess around with the server. But if you’re choosing Cloudways, you’re avoiding the Slick Stack set up or my hardcore server stacks specifically because you don’t want to mess around with server configurations so this is probably acceptable for you.
Steps to take before migrating to Cloudways
If you decide to try Cloudways, here are the steps you should take prior to making the move.
- Delete any of your deactivated plugins – you might want to take a note of them. The reason to delete them is that sometimes their migration tool fails to reactivate your plugins at the other end, so being able to just Select All > Activate speeds up the migration quite a bit.
- Delete any unused themes – it speeds things up
- Backup your site, just in case
- Install the Server IP & Memory Usage Display plugin – this is for your sanity so you can see which server you are currently on
- If you have already performed a dry-run and are ready to go, install a site maintenance plugin to take your site offline while the migration is in process. This is to prevent things like new orders or comments arriving while the migration is happening which then wouldn’t make it to your new server. Alternatively, you can skip this step and manually export and import anything that’s missing from the migration period.
How to actually migrate your WordPress website to Cloudways
It’s really quite easy – but to make it easier I’ve spelled out each step here:
- Create a Cloudways account
- Create a new WordPress App through the Cloudways wizard
- Choose Digital Ocean (or Vultr, AWS, whatever your preference), choose the size you wish and name your app – typically you name your app the same name as your website name
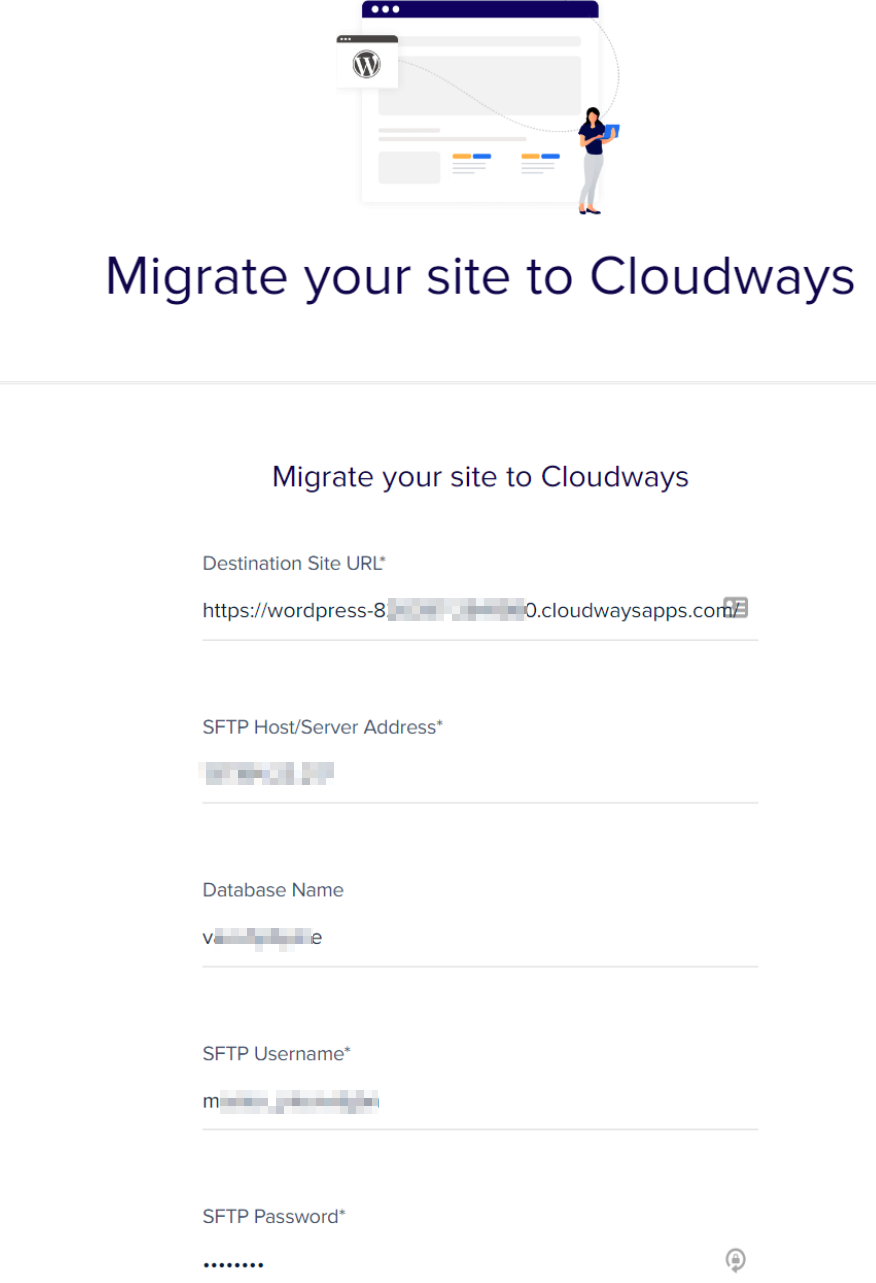
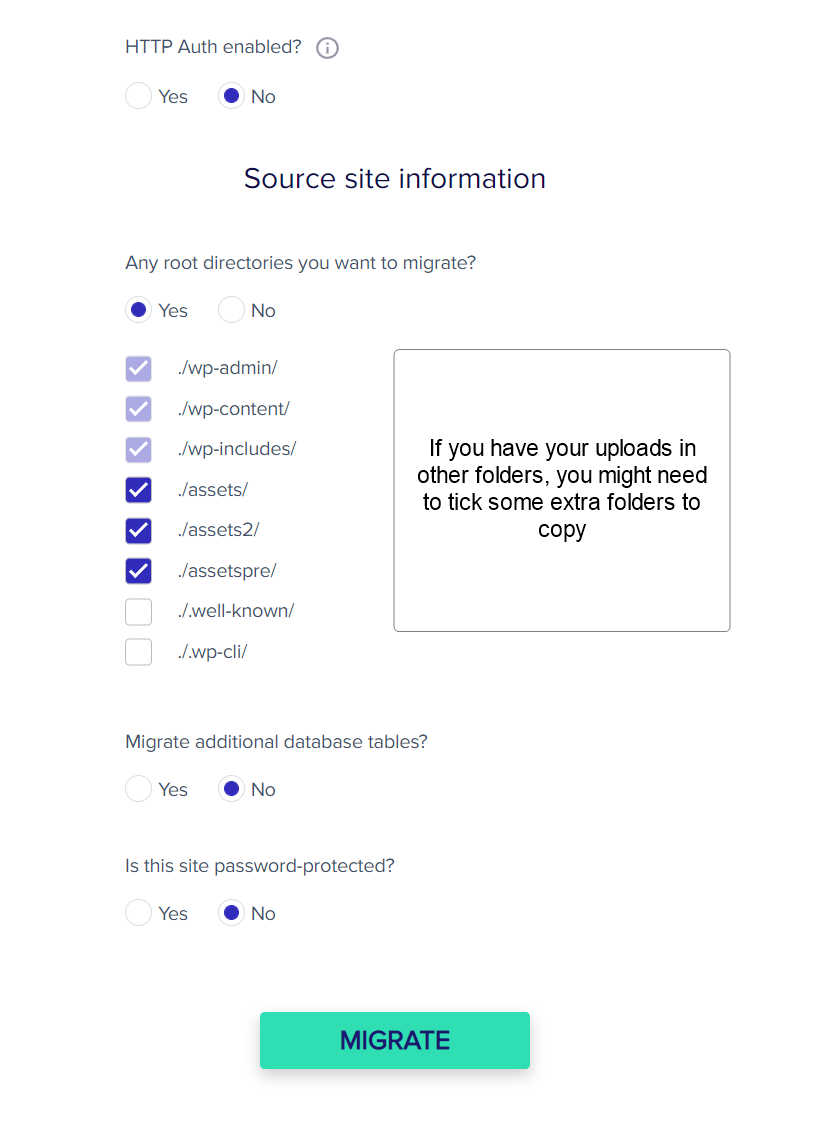
- Install the Cloudways WordPress Migrator plugin on your original website
- Enter the details requested by this plugin as follows:
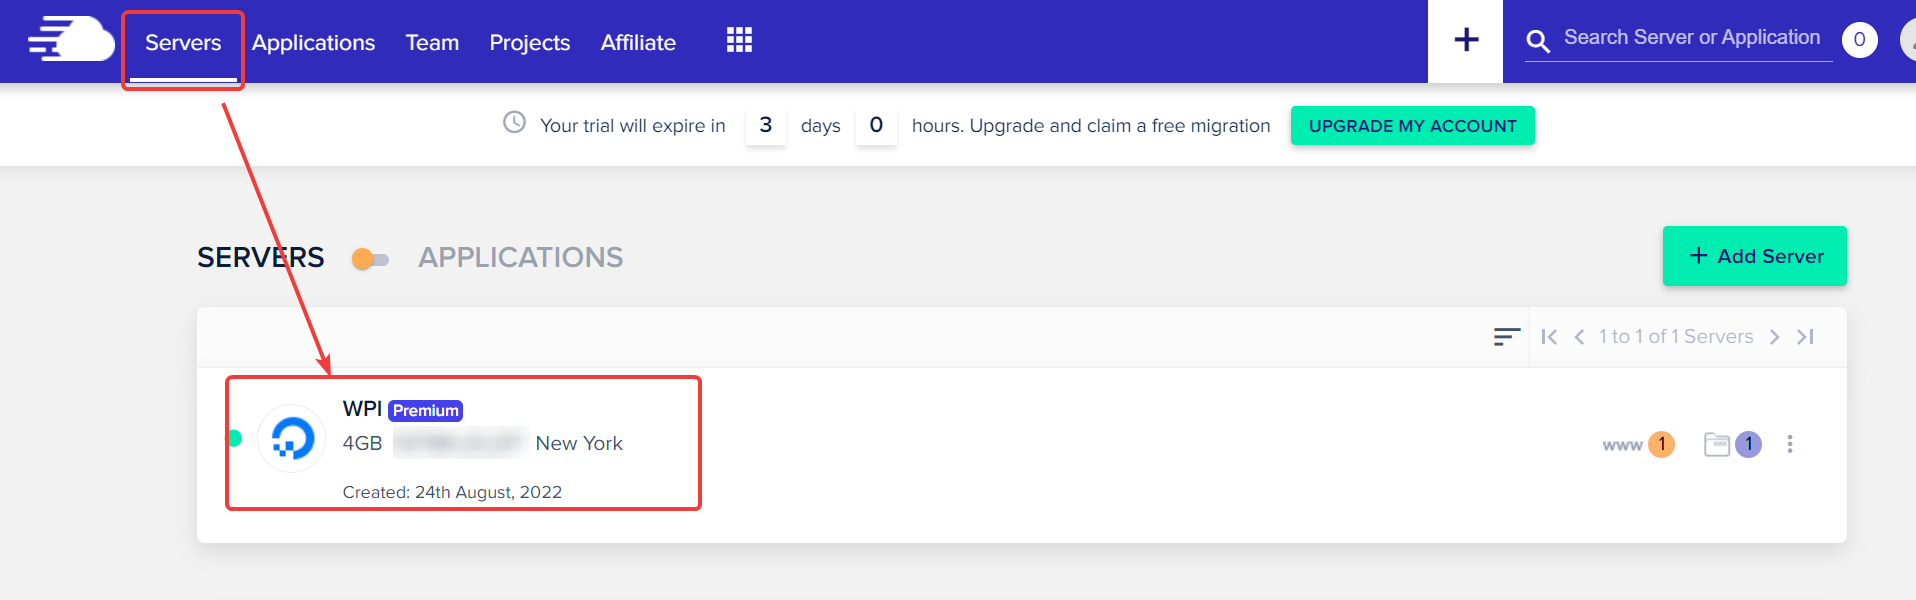
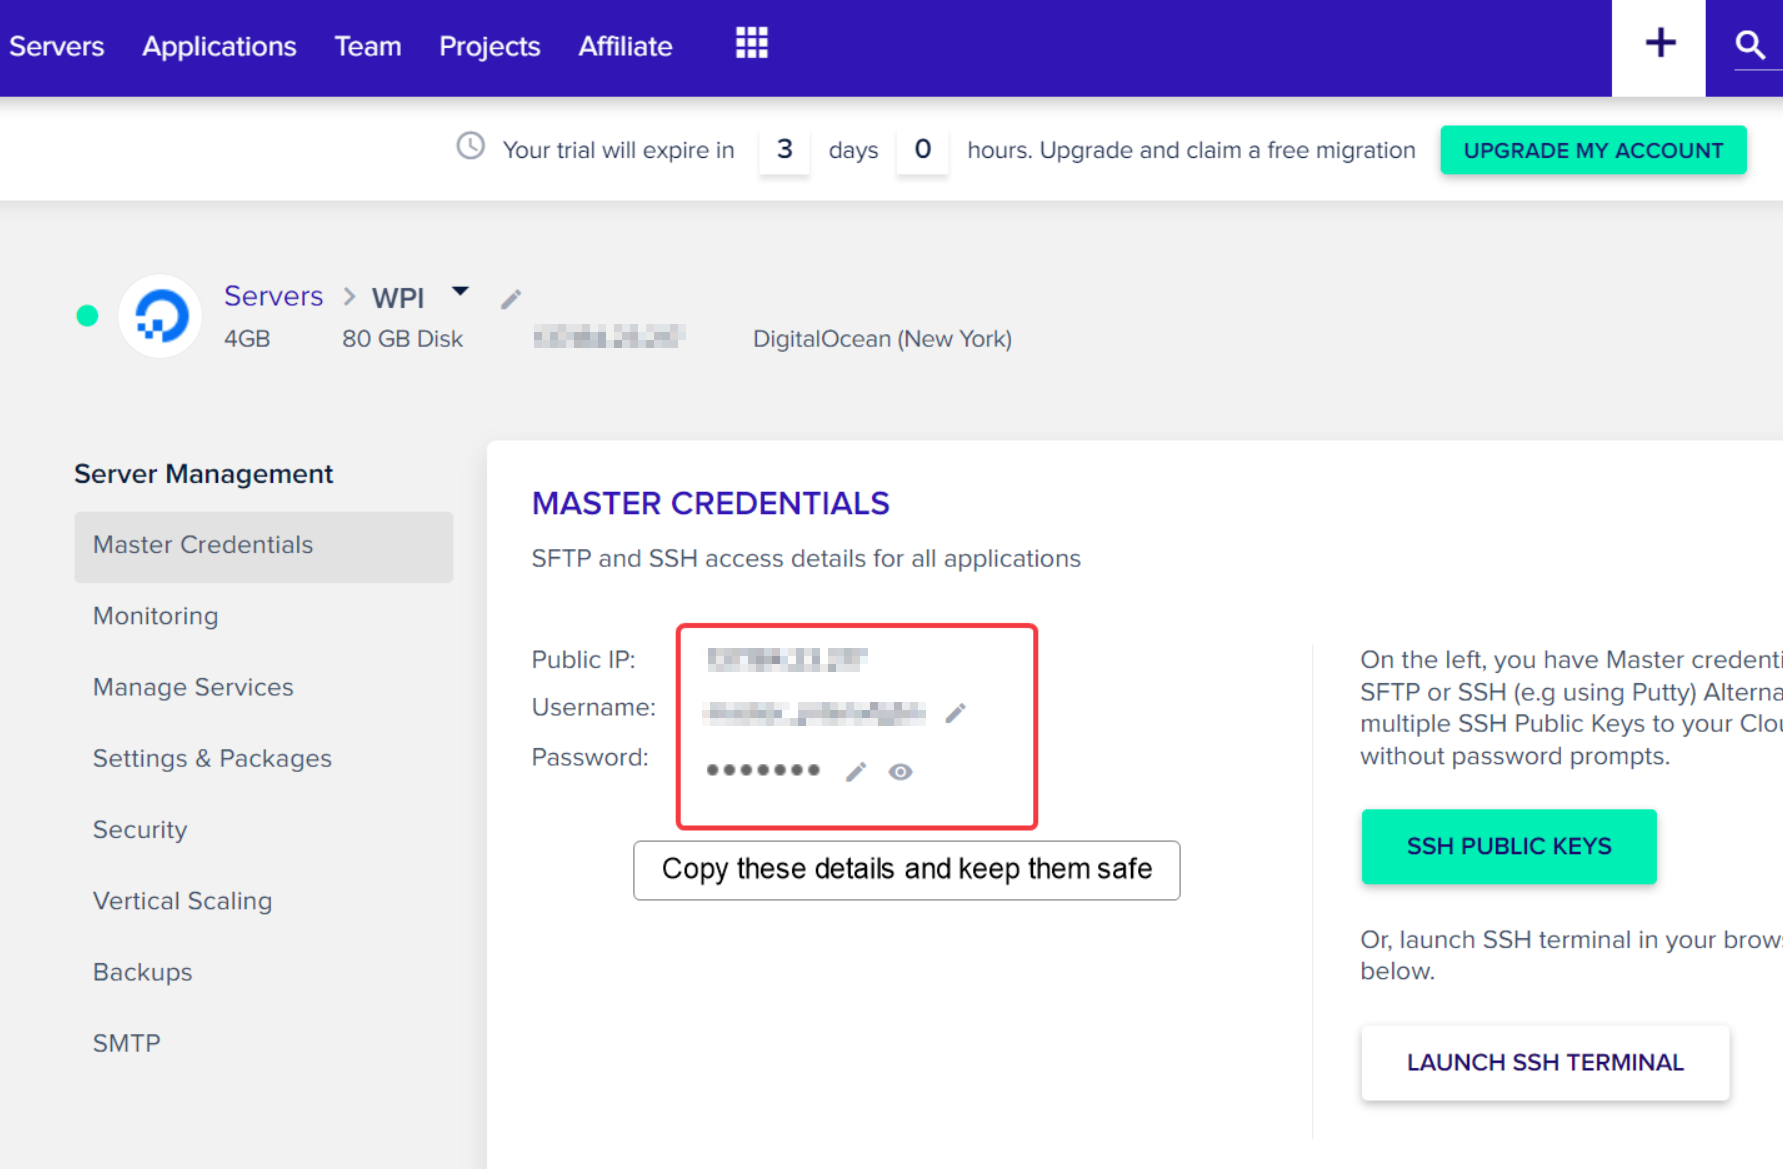
- Copy your SFTP IP address, username & password – in Cloudways, click Servers > Your Server Name then copy IP, username and password
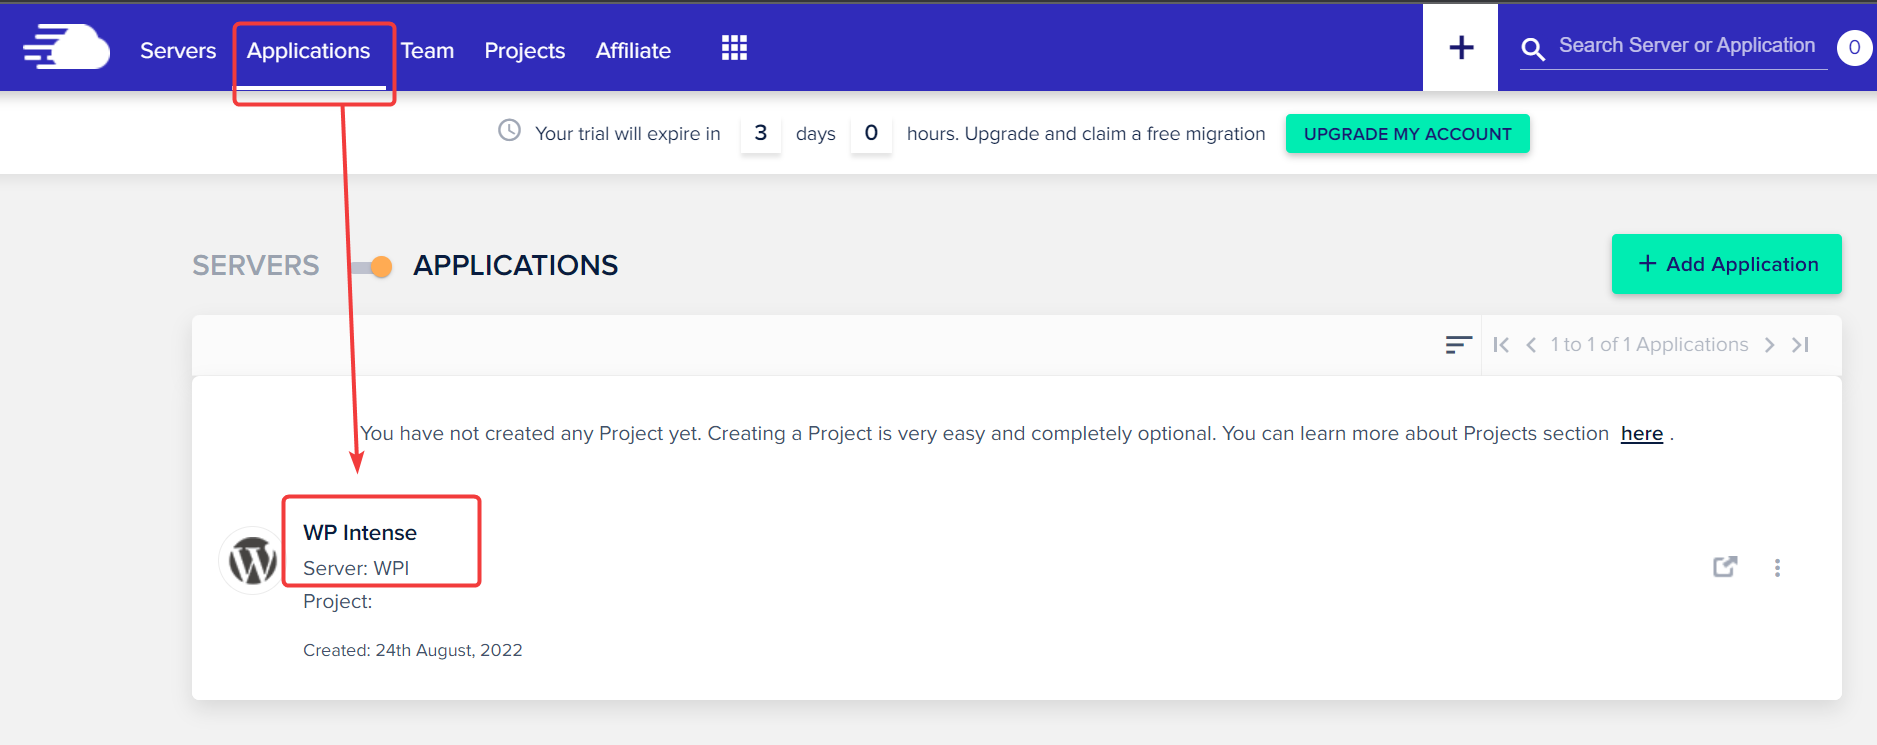
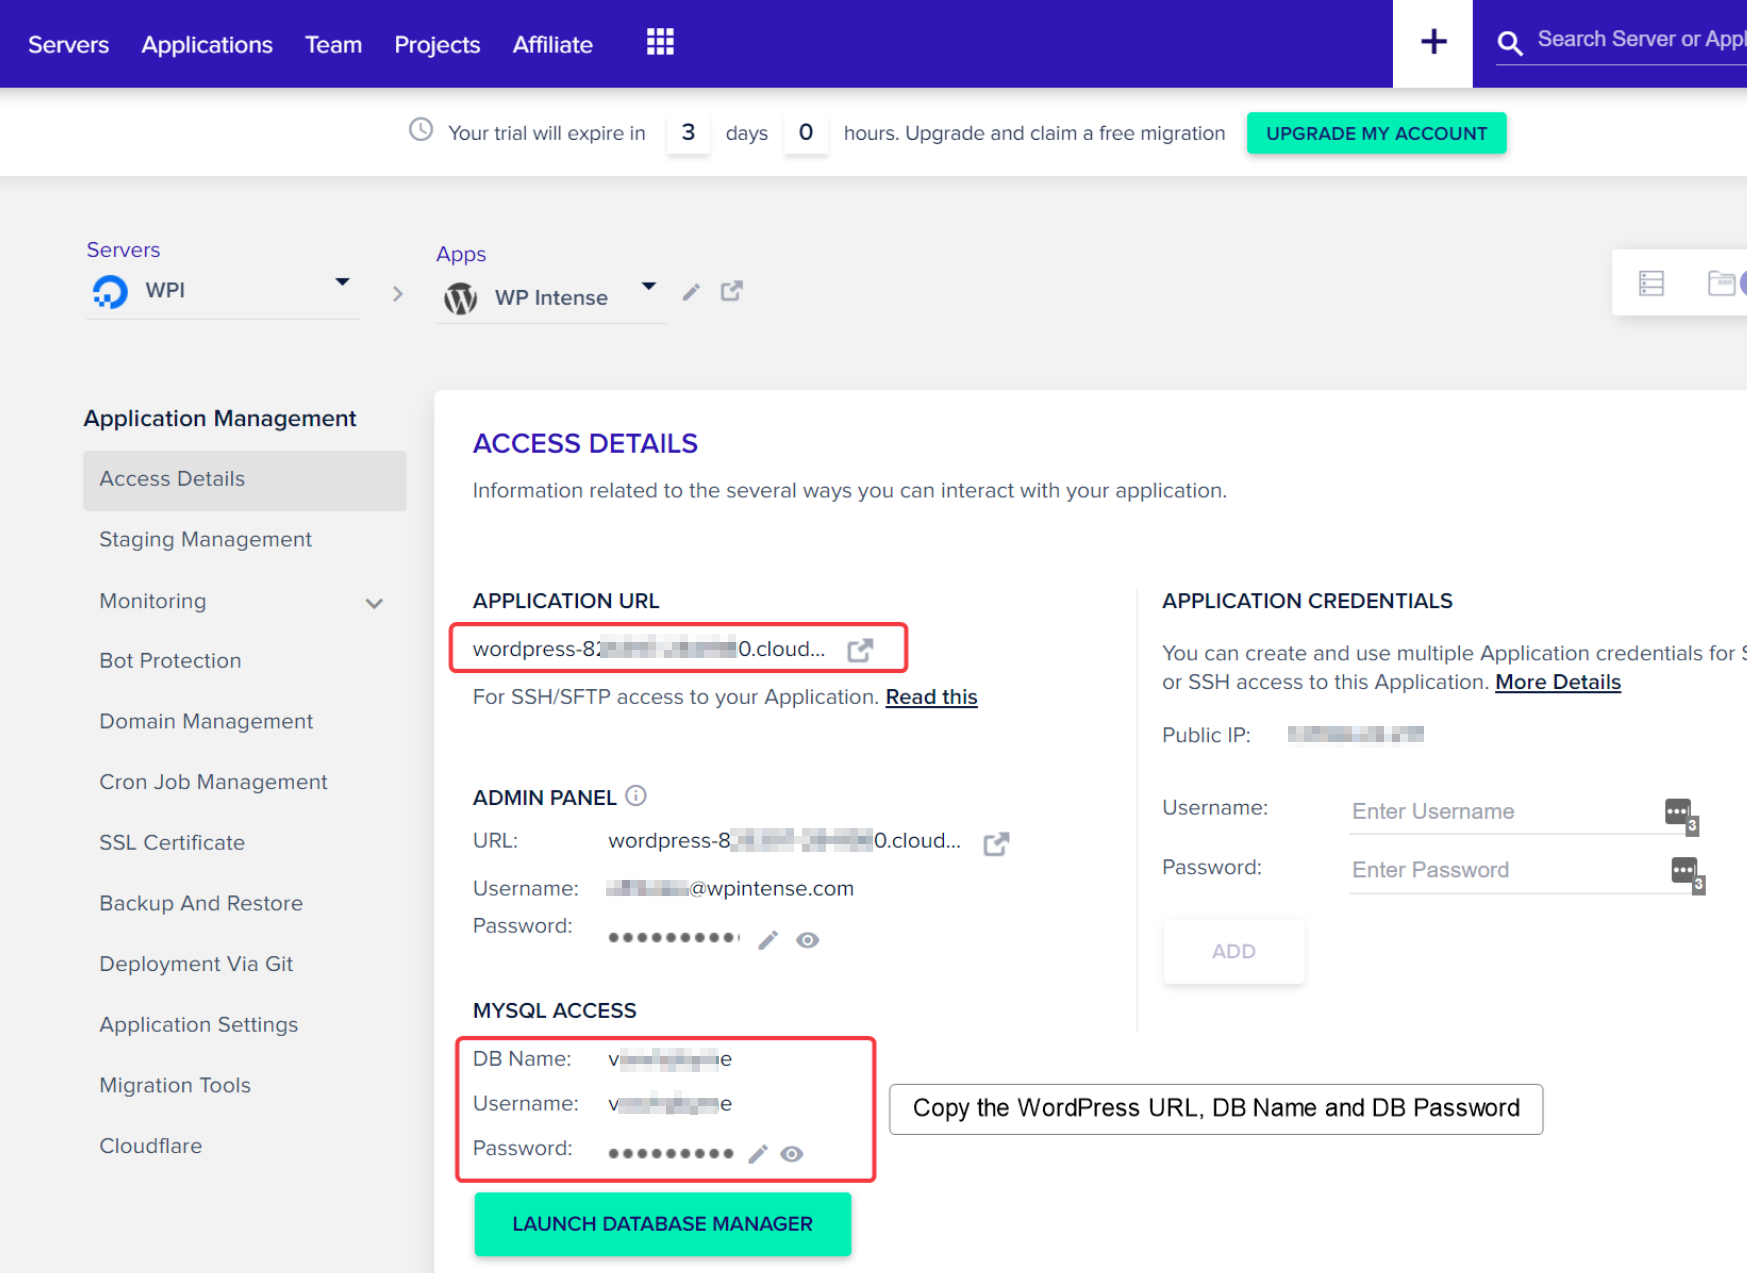
- Copy your application URL – in Cloudways, click Applications > Your Application Name, then click the button to open the URL in a new window. It will be something like wordpress-123-356.cloudwaysapps.com.
- Copy your DB Name from the same application page
- Click Migrate and then wait
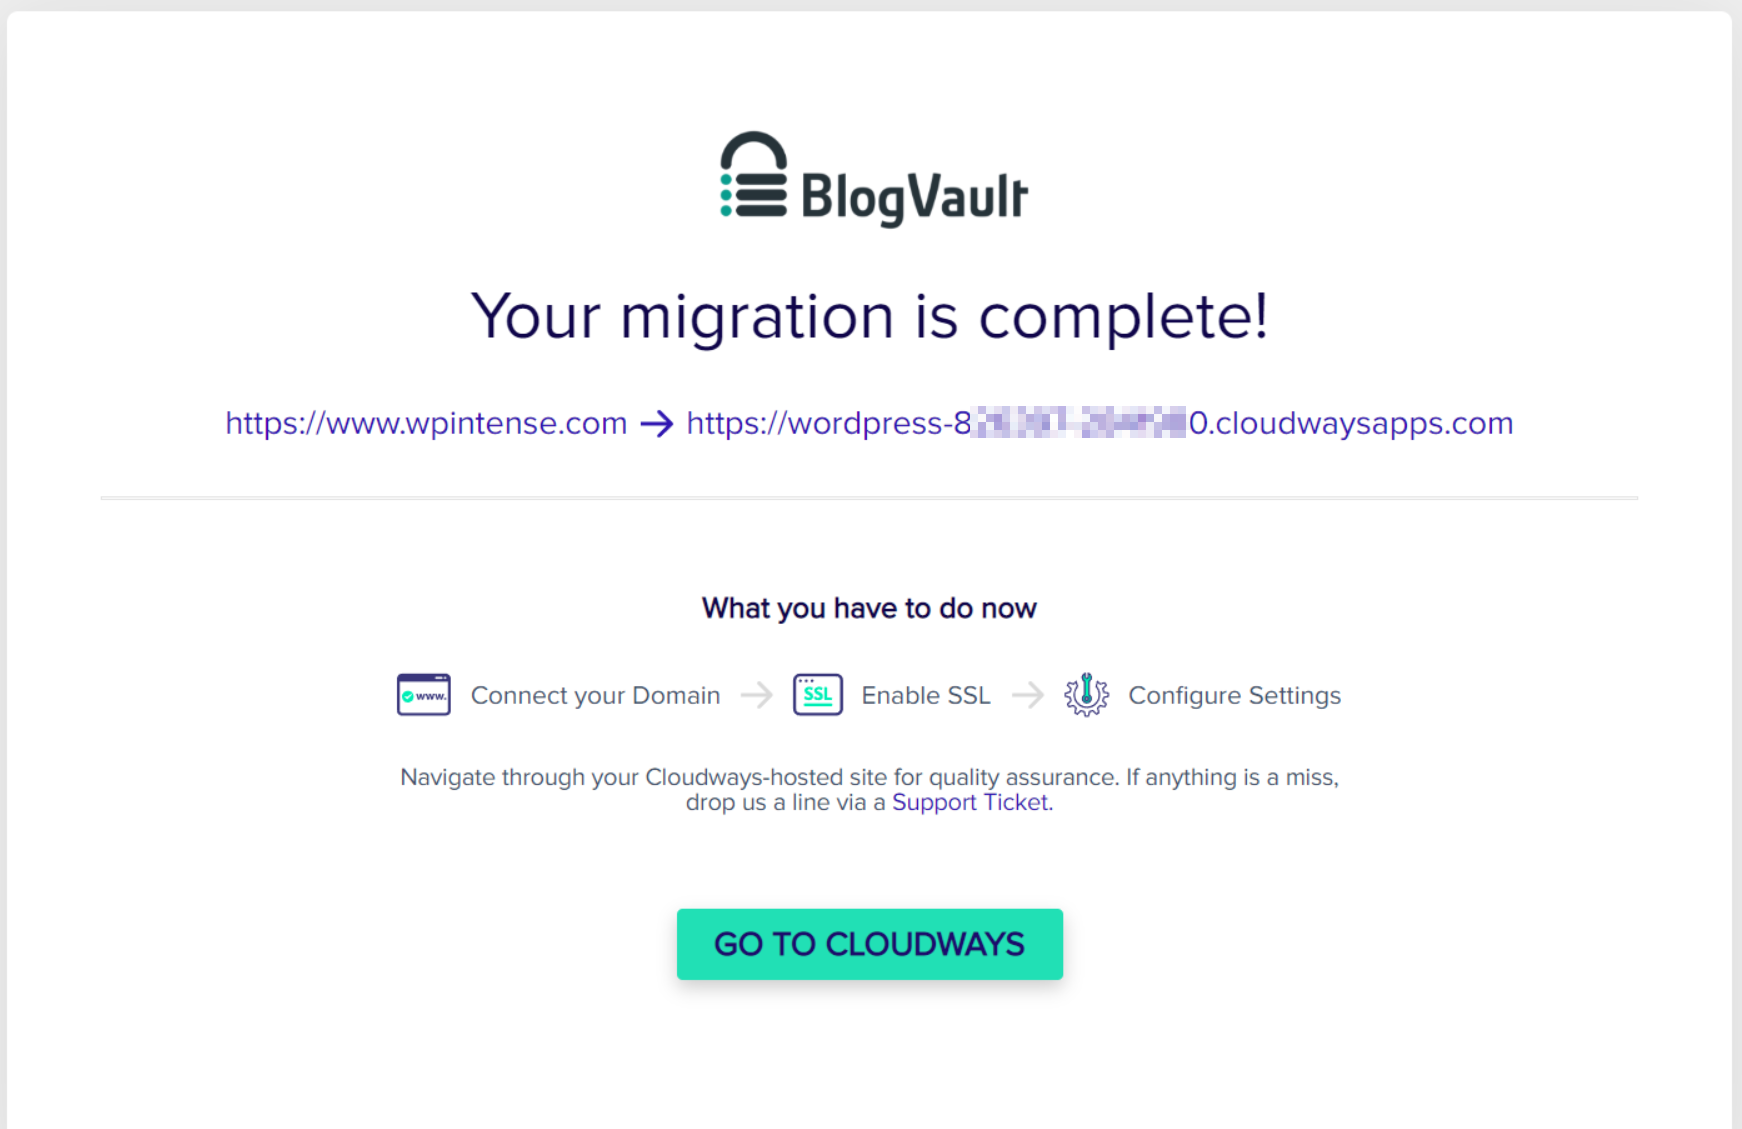
Steps to take after migration
Whether you are doing a dry run or finally moving your live website, these are the steps you should take after your migration is complete to finalise everything.
- Re-activate your plugins, if they are not automatically reactivated
- Re-activate your theme or child theme
- Visit Settings > Permalinks and hit SAVE otherwise you may experience 404 errors on pretty URLs
- Check your sidebars – I found in two cases that sidebar settings (wp-admin > Appearance > Widgets) were missing. If they are missing for you and this is your only issue, use the Widget Importer and Exporter plugin to export and import your widgets. Check your widgets afterwards as this plugin sometimes randomly adds extra empty blocks into your sidebars.
- Test thoroughly
- Visit Cloudways Application Management > Domain Management and enter your domain name – Cloudways will perform a search & replace of your temporary cloudways domain with your live domain name
- Change your DNS to point your domain at the IP address of your Cloudways server
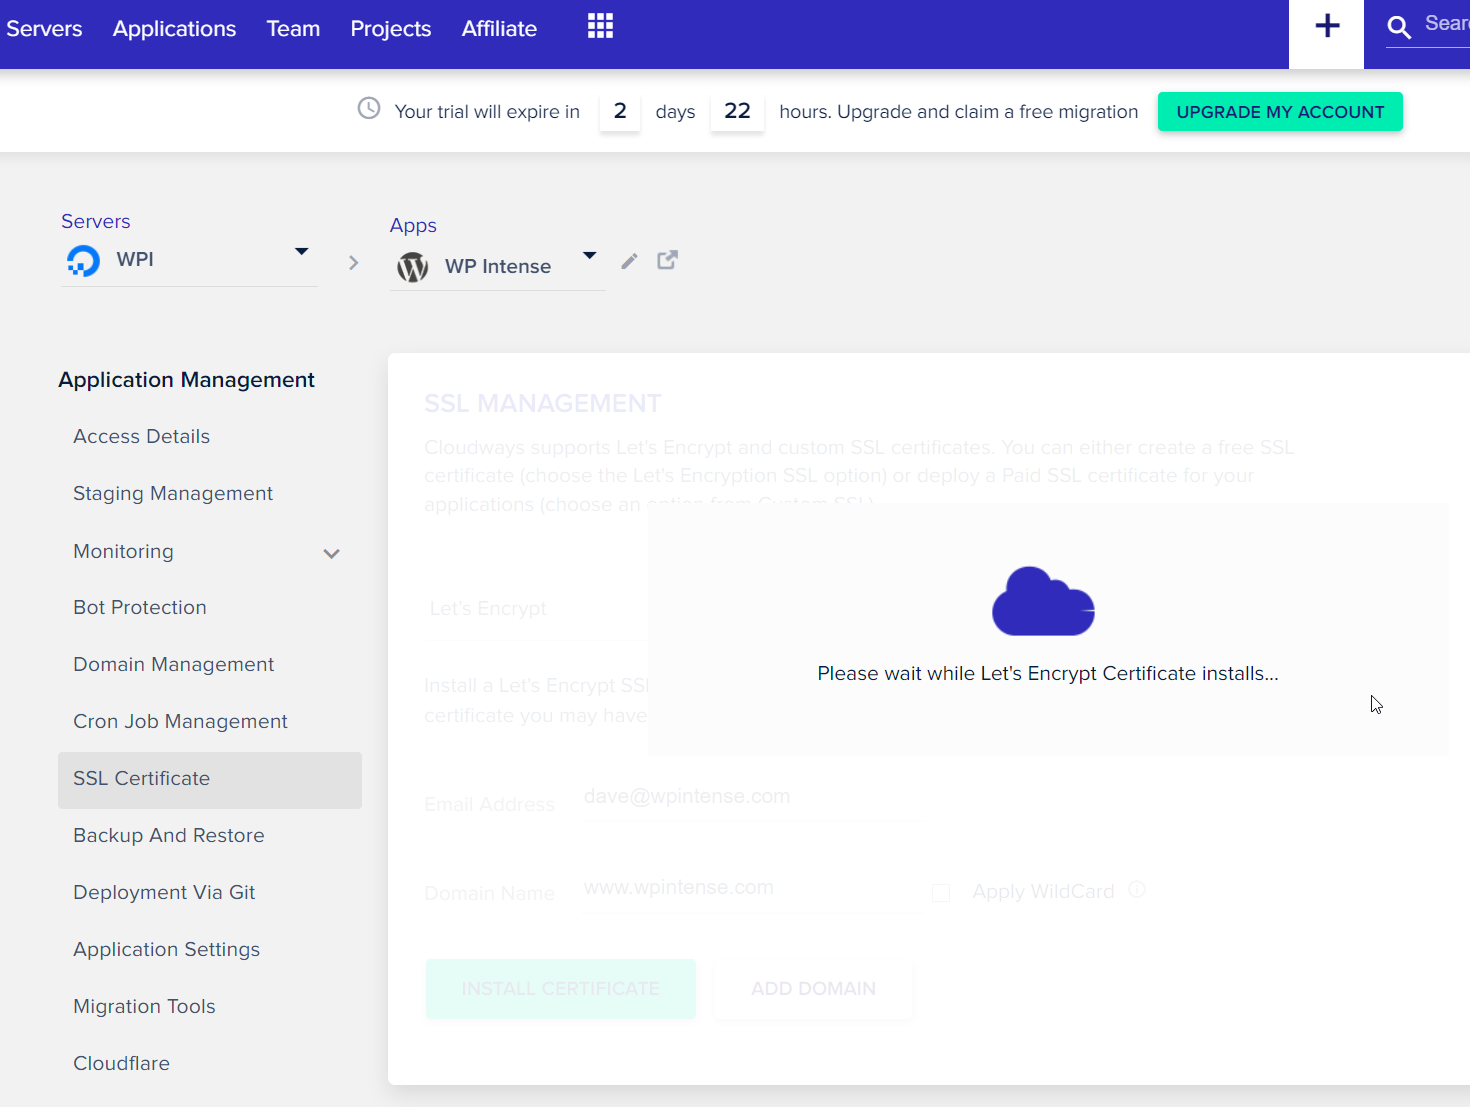
- Visit Cloudways Application Management > SSL Certificate and enter your domain name to generate a fresh SSL certificate
- Test further with your live domain name
- Deactivate your site maintenance plugin.
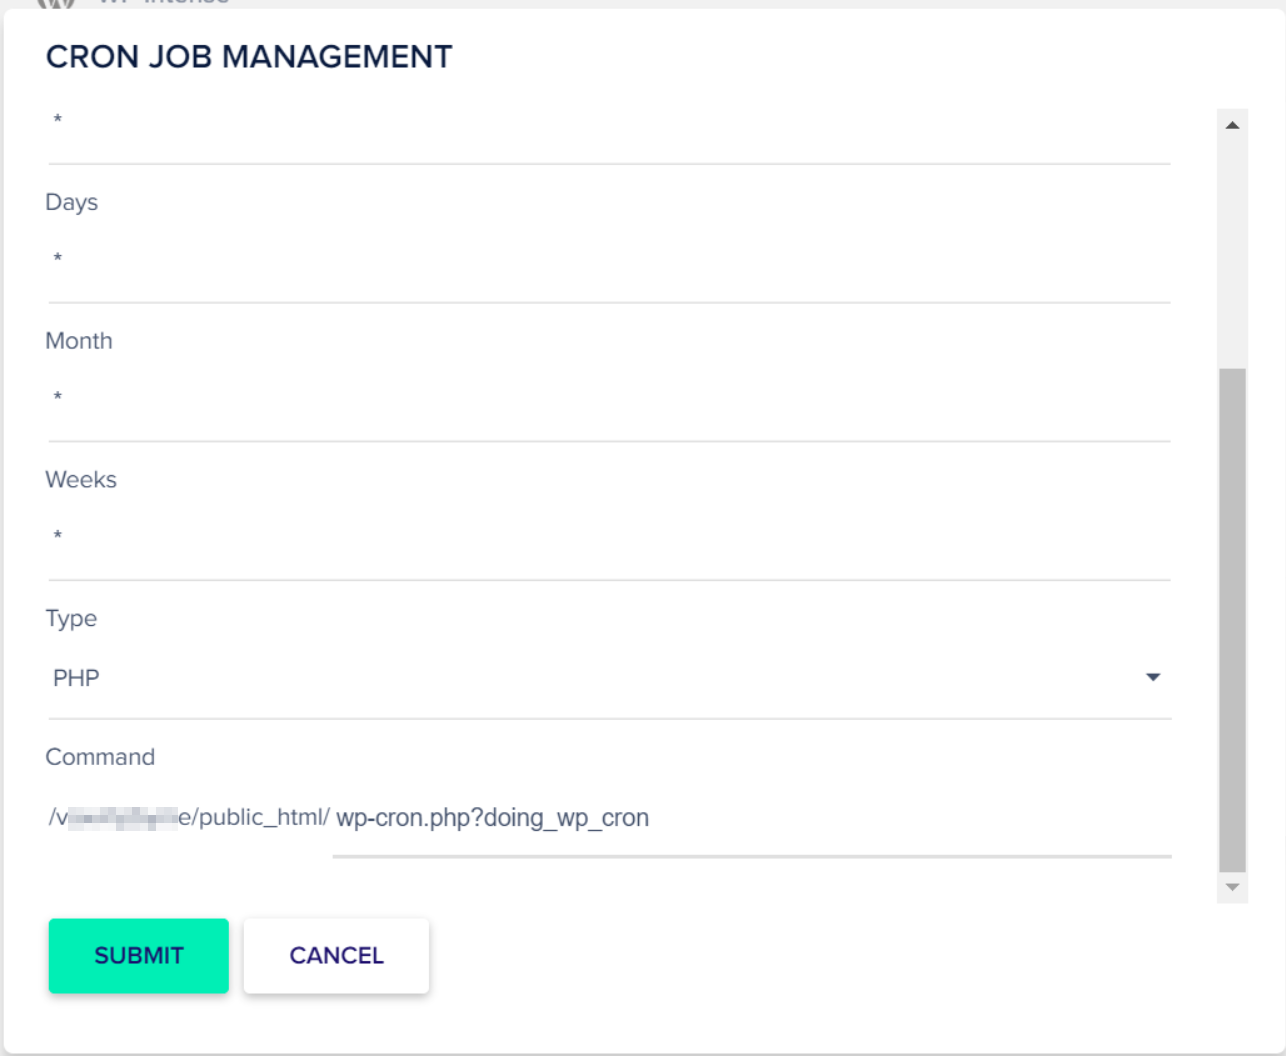
- Add a real cron job through the Cloudways interface – choose every minute, choose PHP, and enter this command: wp-cron.php?doing_wp_cron – or follow the guide here – https://www.cloudways.com/blog/wordpress-cron-job/#how-to-set-up-a-real-cron-job
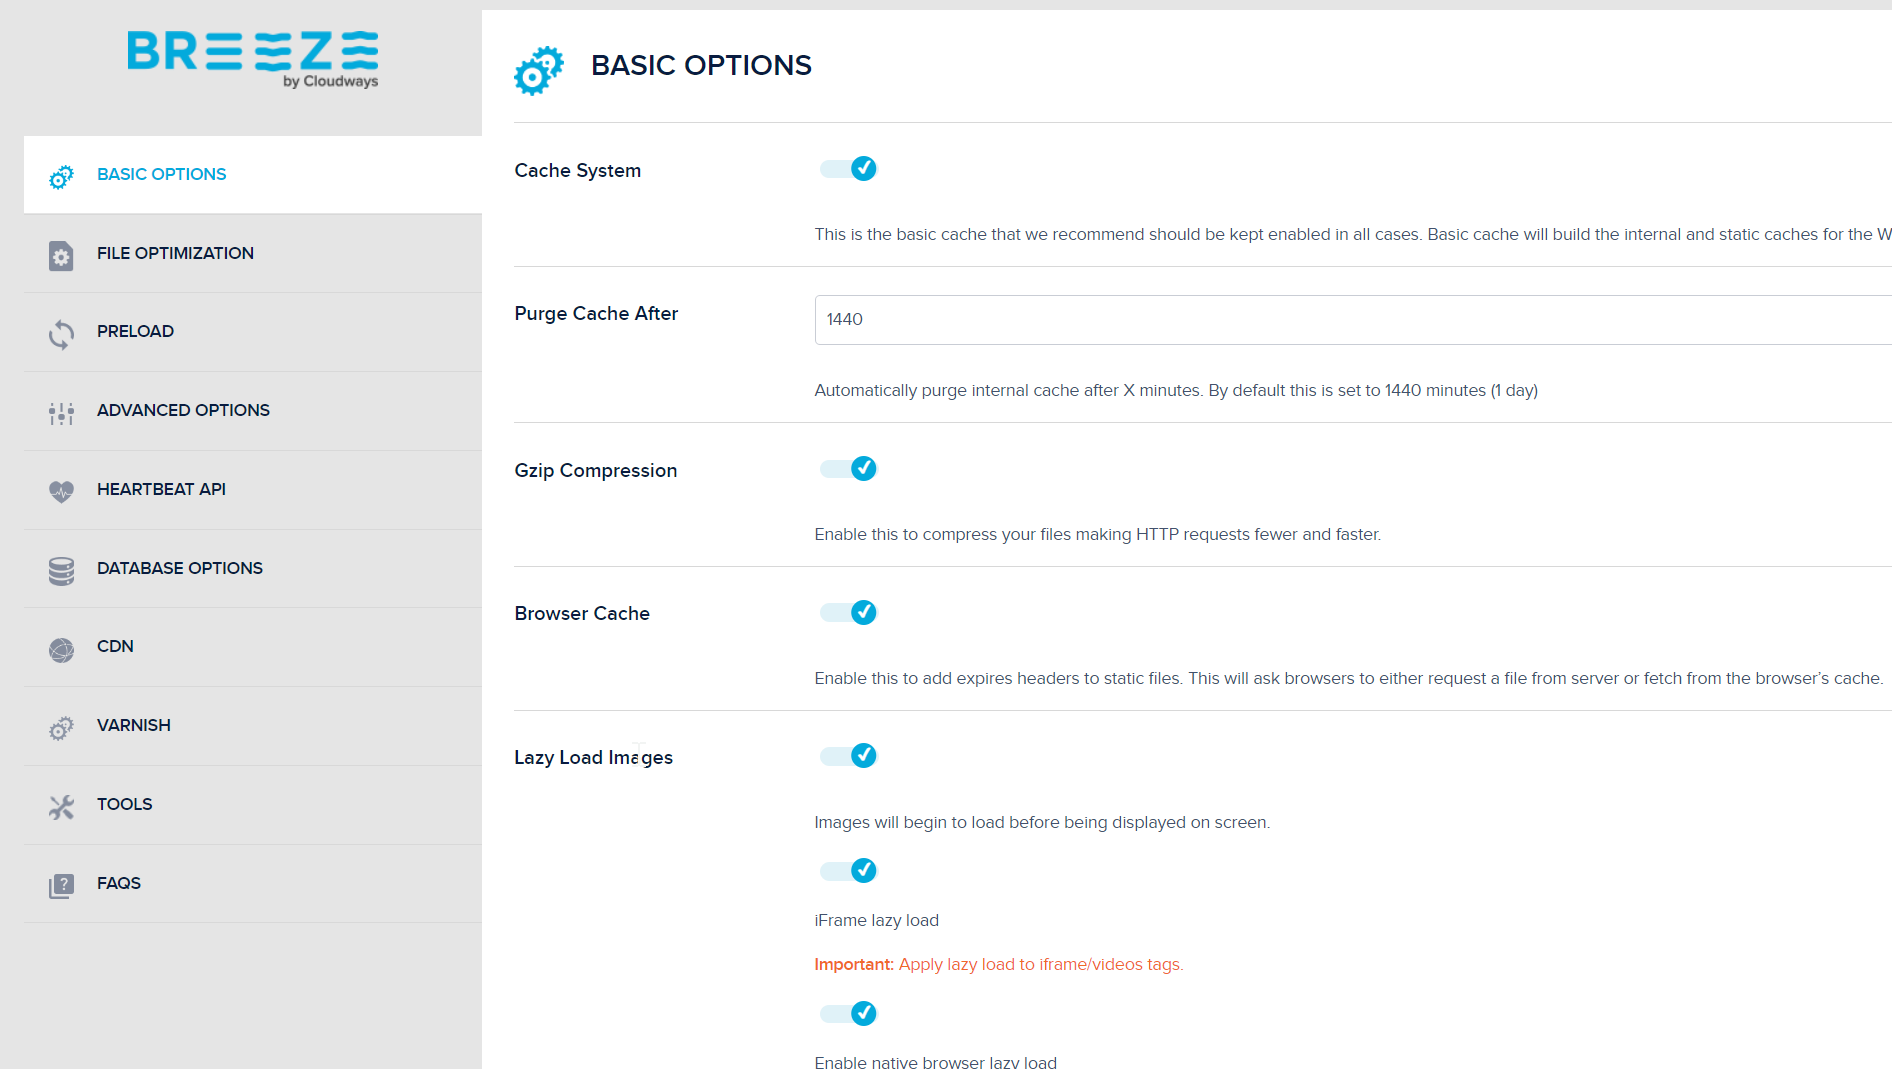
- Install and configure the Cloudways Breeze plugin – there are plenty guides out there for this, but it’s really quite easy
- Optionally configure their Malcare plugin to protect your site from attack
- Configure Cloudflare too – I continue using the official Cloudflare plugin
Visual guide to migrating your WordPress website to Cloudways
Follow this visual guide so you don’t get lost as well as using the steps above. It’s really quite easy, but can be daunting to newbies.
Trouble Shooting
I mentioned above in the post-migration steps to check your widgets. If your widgets are broken or missing after migration then use the widget exporter/importer plugin.
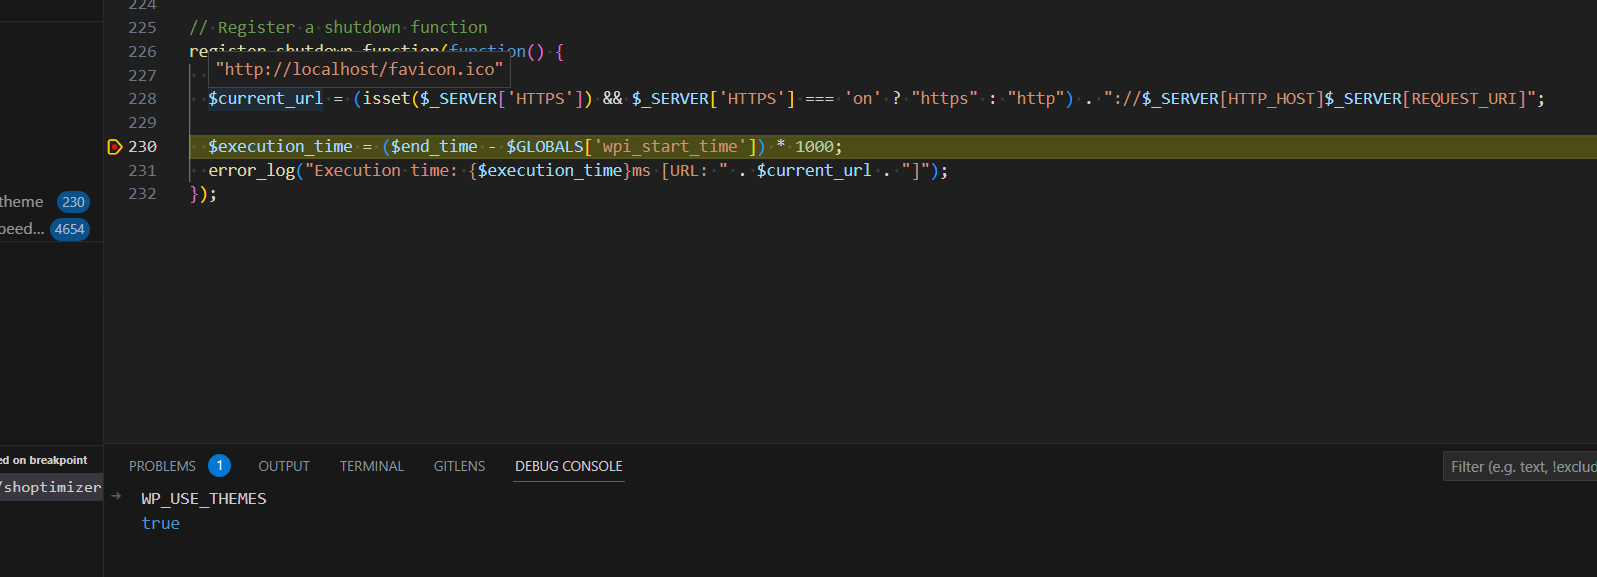
A few days after migrating my website to Cloudways I discovered our Q&A system was marking new questions as 53 years old. 53 years ago is 1970 which is the default date for a null date value in Linux.
I discovered the Cloudways sql_mode was not set how I normally like and there is no way to change it – that’s a little bit annoying and will probably result in me moving away from Cloudways for my own website. However, I’m going to continue with them for a little while so I can continue to troubleshoot these kind of post-migration headaches for all of you out there who love managed hosting.
I wanted to add these rules to the sql_mode in Cloudways:
ONLY_FULL_GROUP_BY,NO_ZERO_IN_DATE,NO_ZERO_DATE
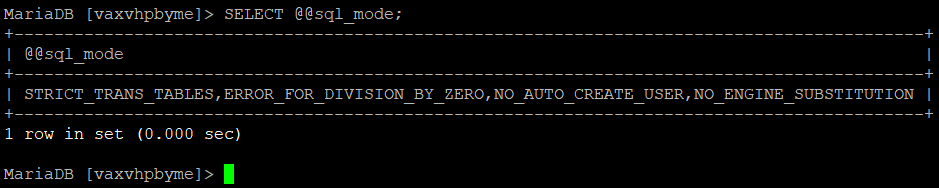
The sql_mode that comes with Cloudways is:
STRICT_TRANS_TABLES,ERROR_FOR_DIVISION_BY_ZERO,NO_AUTO_CREATE_USER,NO_ENGINE_SUBSTITUTION
In this case, since I cannot change the sql_mode in Cloudways. They don’t give you sudo access, so I can read the /etc/mysql/my.cnf file but I cannot edit it and their platform settings page for mysql does not provide this level of control. So, to fix these incorrect dates on the WordPress posts table I instead altered the table defaults on wp_posts using the following command:
ALTER TABLE wp_posts
MODIFY post_date DATETIME NOT NULL DEFAULT CURRENT_TIMESTAMP,
MODIFY post_date_gmt DATETIME NOT NULL DEFAULT CURRENT_TIMESTAMP;
My Overall Opinion of Cloudways
Cloudways got bought by Digital Ocean for $350 million for good reason. They have built a beautiful and easy to use WordPress control panel where you can easily install multiple WordPress websites on each server and easily migrate them across. The stack they use is a good compromise on ease of use and performance.
It’s not as fast as building your own stack – largely thanks to their inclusion of Apache – but with the extra packages on offer at no extra cost (Malcare, Object Cache Pro) and the per-website discounted option of Cloudflare for $4.99 you might actually save money compared to building your own stack.
They’re definitely the best of all the managed hosting options out there – since they do not actually host you themselves, they are far less incentivised to just tell you to upgrade your server to get more speed if you contact their support staff.
If you are currently on Dreamhost, Hostgator, GoDaddy hosting or any of the other shared hosts then you’ll find a MASSIVE improvement in performance.
With their 3-day free trial and easy migration process, it’s worthwhile giving them a try while keeping your current website online. Their migration process doesn’t take your live site offline and gives you a clone of your live site so you can compare the performance to your current hosts.
They are the only managed hosting service we recommend. If you do decide to give them a try, please consider visiting them through my affiliate link and they’ll give me a little reward if you end up signing up.