

Our External Images plugin alters WordPress to allow you to use featured images and image galleries that are hosted off-site, often on an affiliate CDN, sometimes on Amazon S3.
There are two reasons why this is desired – the first being the vast reduction in storage requirements for your server and the second being significant speed boosts for import jobs.
When you import products or posts that included featured images, WordPress loads the full size image to your uploads folder but it also creates multiple resized copies of this image, depending on how many image sizes you have registered on your website. This uses CPU and disk.
Table of Contents
- Quick Start
- How to alter import jobs
- Importing multiple images into your gallery
- (Optional) Import gallery image URLs to a separate field
- (Optional) Force External Images to recheck images
- Prepend Image Names with Image URLs
- Adding Captions, Alts, and Titles to Images
- How to Import Using WebToffee WooCommerce Importer
Quick Start
Import your images, separated by the pipe symbol, to the external_image_url custom meta field. If you have two separate import jobs for featured images and image galleries, you can optionally keep external_image_url just for the featured image and instead import image galleries URLS (pipe separated) into the custom meta field gallery_urls. This works for all post types, provided the post type has specified it supports galleries. It also works for products and product variations meaning you can have variation galleries if you wish.
How to alter import jobs
The essentials are very simple. Do not import ‘featured images’ or ‘gallery images’ using the normal images feature of your import tool. Instead, you map these fields from your import to a meta field called external_image_url. This meta field can contain multiple images separated by the pipe | symbol and the first image will become your featured image.
Here’s an example using WP All Import – in the image below, you’ll see the typical set up where images are configured to be downloaded to your server.
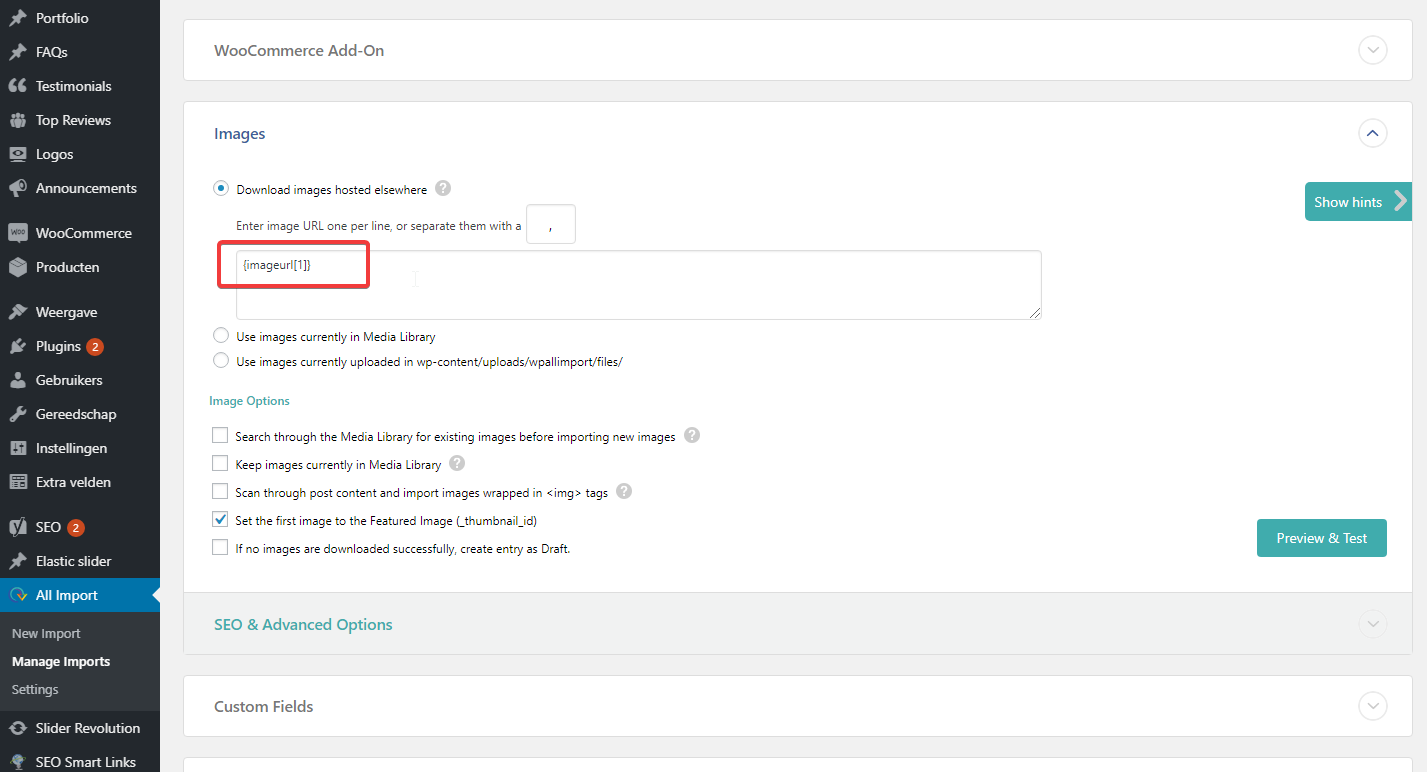
So – in the example above, the source field in the import is {imageurl[1]}. To update this import job to work with External Images, you simply delete this {imageurl[1]} from the Images import and put the {imageurl[1]} into the Custom Fields area below it.
Now when you run your import, WP All Import will treat your {imageurl[1]} field like a standard text custom meta field and will not process the images. The External Images plugin will spot that this external_image_url field is populated and will use it to create your featured images.
Importing multiple images into your gallery
If you have multiple images for your posts or products or custom post types, External Images also handles that. There are two possible scenarios:
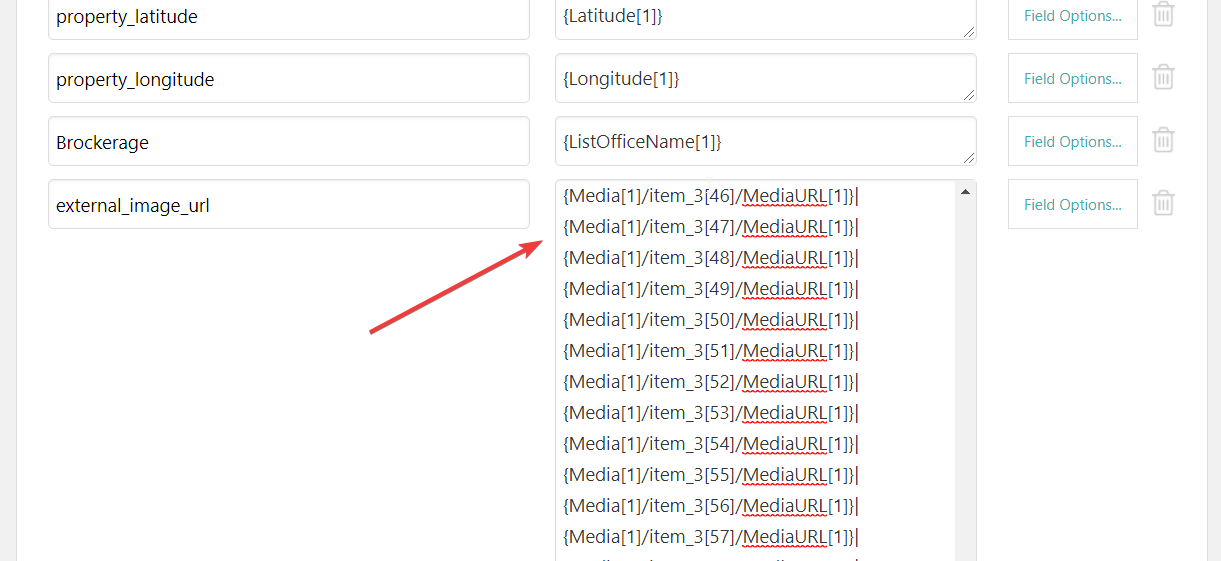
Your source import file has one field containing all images
In this case, ensure the separator is a | (pipe) symbol and import that field to a custom field called external_image_url. External Images will extract the images using the first image for the featured image and thumbnail, and the remaining images will be added to your External Images gallery.
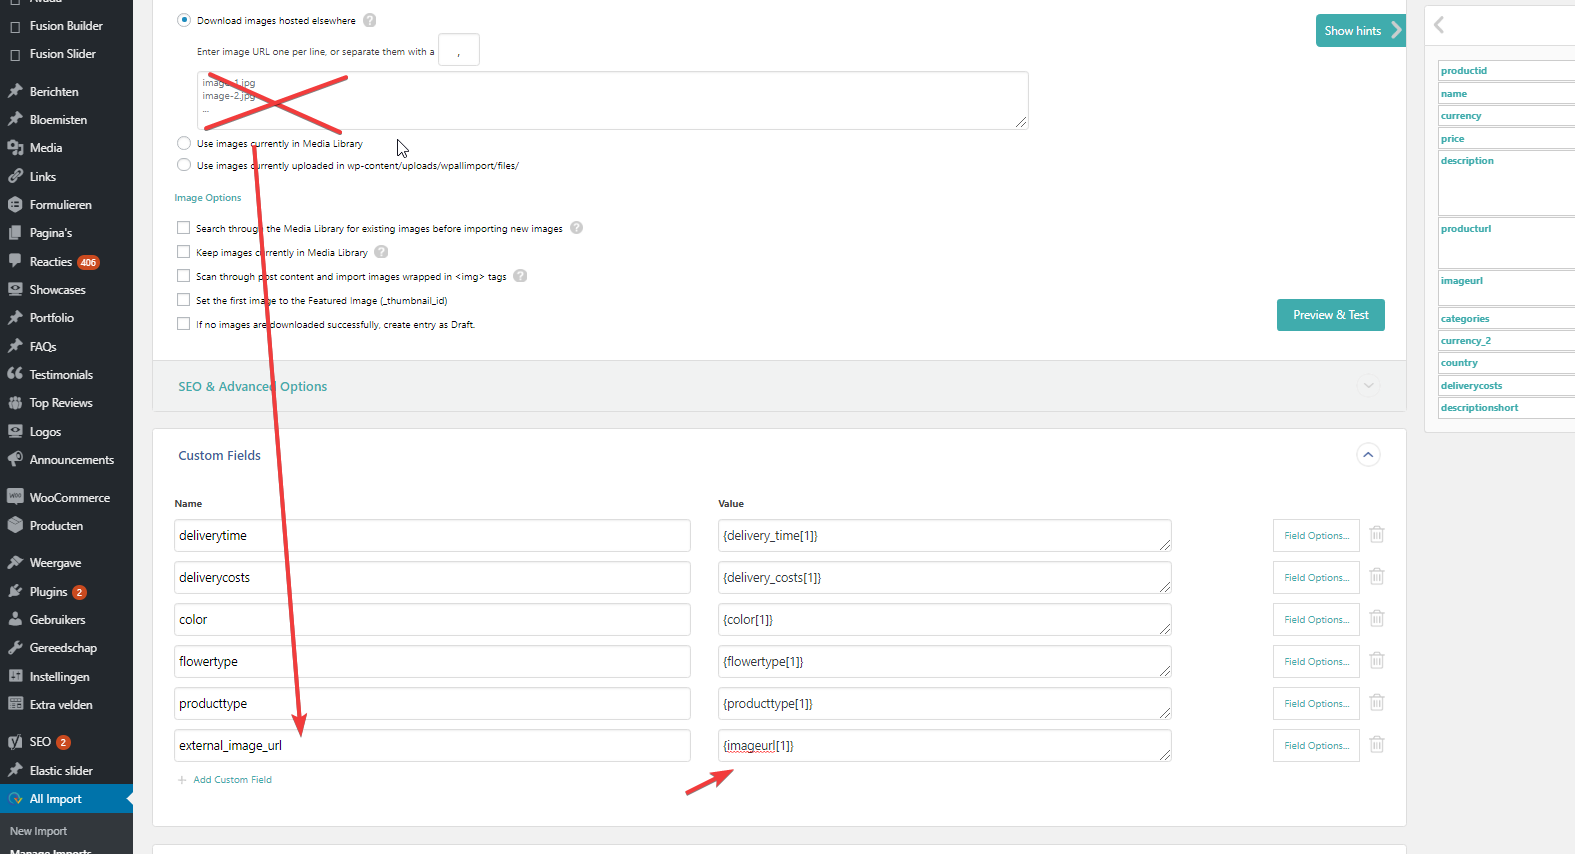
Your source import file has multiple fields containing one image each
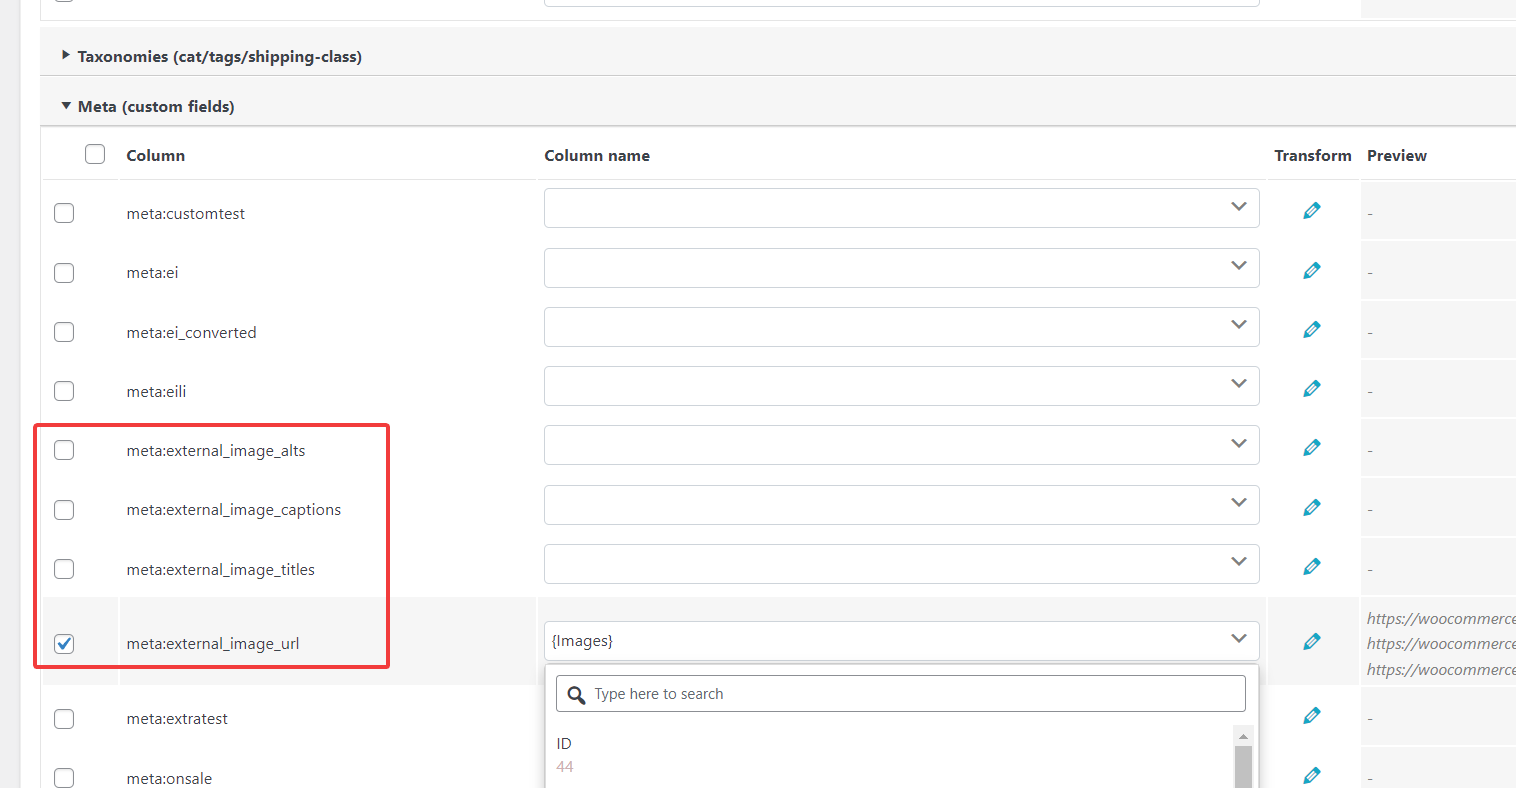
Simply copy all of those image URLs to the external_image_url custom field and separate them with the pipe | symbol. The example below is a screenshot from how it would look using WP All Import (which we highly recommend, it’s the best importing plugin):
(Optional) Import gallery image URLs to a separate field
You can import all your images to the external_image_url field, separated by the pipe symbol, or you can keep that field for the featured image and instead import your gallery URLs to the gallery_urls custom meta field.
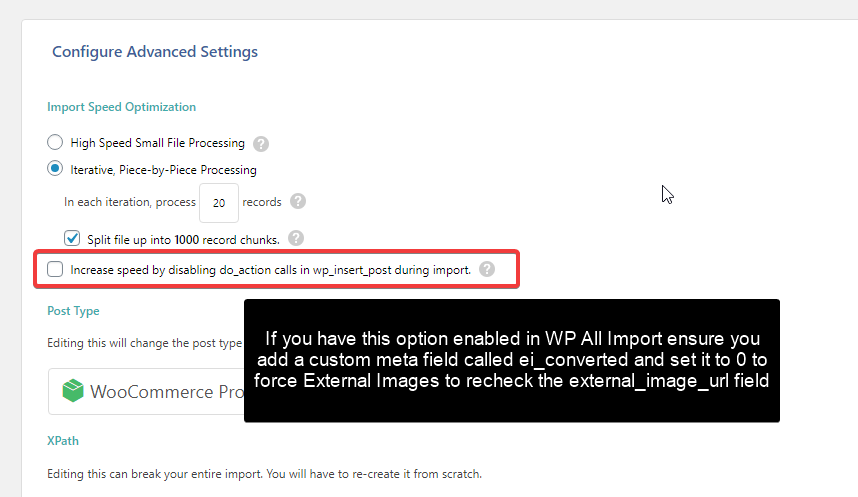
(Optional) Force External Images to recheck images
In some cases you may have configured your import to bypass the WordPress do_action hooks – e.g. using the WP All Import speed boosting option to bypass do_action – if this applies to you, you should ensure you set an extra custom meta field called ei_converted to 0 (zero) to force the plugin to rescan your freshly imported images.
When you load image URLs to the external_image_url field, the first time the post/product is viewed containing that field the plugin will split apart these image URLs and create the external featured image and the external image gallery for you. This includes measuring the size of the external images and checking that they exist.
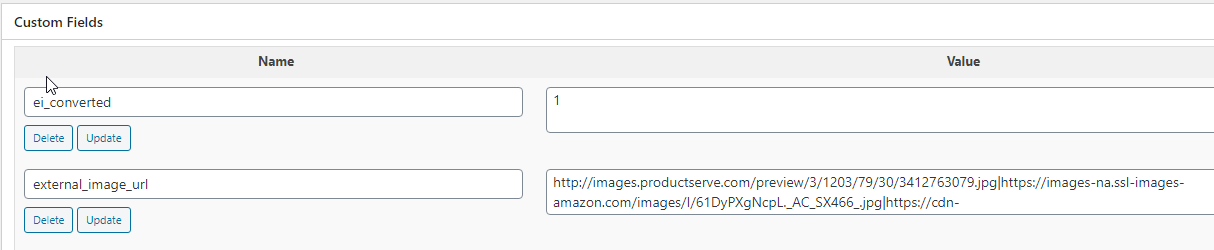
To save time and server resource and avoid having to check image sizes every time, the custom meta field ei_converted is set to 1 by the plugin.
If this field gets set back to zero or deleted, the plugin will rescan the external_image_url field to pick up the images again.
There is an action hook added to the update_post_meta WordPress function which will catch the vast majority of cases when the external_image_url field is modified manually or through import jobs.
This hook deletes the ei_converted field so that the External Images plugin will rescan the external_image_url field for new images, but if you are bypassing do_action hooks then you should manually change ei_converted to 0 to force the plugin to recheck these images.
Prepend Image Names with Image URLs
If your import contains image names but not image URLs, you will need to prepend the image URL in your import.
For example, if you have image names in your import like image1.png but the full image URL is:
https://images.yourdomain.com/image1.png
then you need to adjust your import to prepend this image URL. (Alternatively, change your import file to include the full image URL).
If you wish to dynamically prepend the URL onto these images, you may run into an issue if you have variable images. For example, if one post has 1 image and another has 2 images your import in WP All Import may be:
https://images.yourdomain.com/{imageurl[1]}|https://images.yourdomain.com/{imageurl[2]}
If you set up your import like this, when the 2nd image URL is missing you will still be passing a URL to external images and you will end up with a blank image.
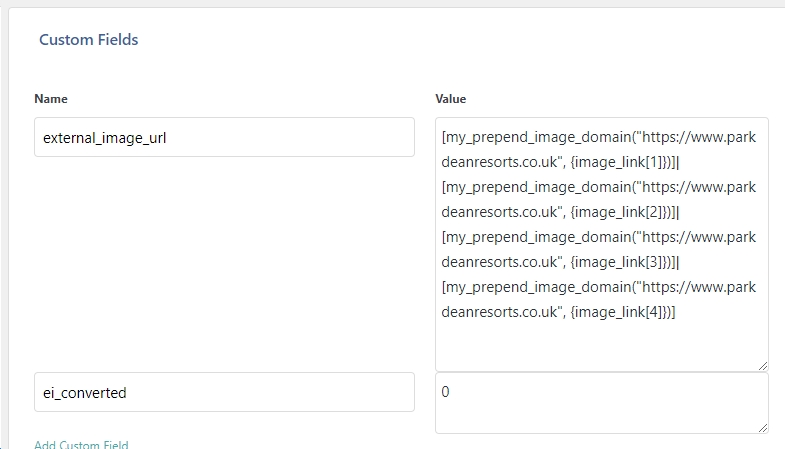
To fix this, in WP All Import you can create a function to generate the image URL with code like this:
my_prepend_image_domain($domain, $image) {
if (empty($image)) return '';
return $domain.$image;
}
This function will return an empty string if there is no $image defined. Your WP All Import will then need to be modified like in the image below.
Adding Captions, Alts, and Titles to Images
To add captions, alts and titles to your images, we have 3 other postmeta fields where these should be loaded. These entries should be in the same order as the images you loaded into external_image_url and should be separated by the | symbol.
The 3 additional postmeta fields are:
- external_image_alts
- external_image_titles
- external_image_captions
How to Import Using WebToffee WooCommerce Importer
For some crazy reason, WebToffee lists all the existing postmeta keys that are already in your database and only allows you to import to those! I am contacting them here to try and get them to fix this. I don’t understand how others can import to a fresh website if they need to import metadata.
Here’s a workaround in the meantime – basically, manually create a new product and add the 4 postmeta fields and a random fake value.
- Products > Add New
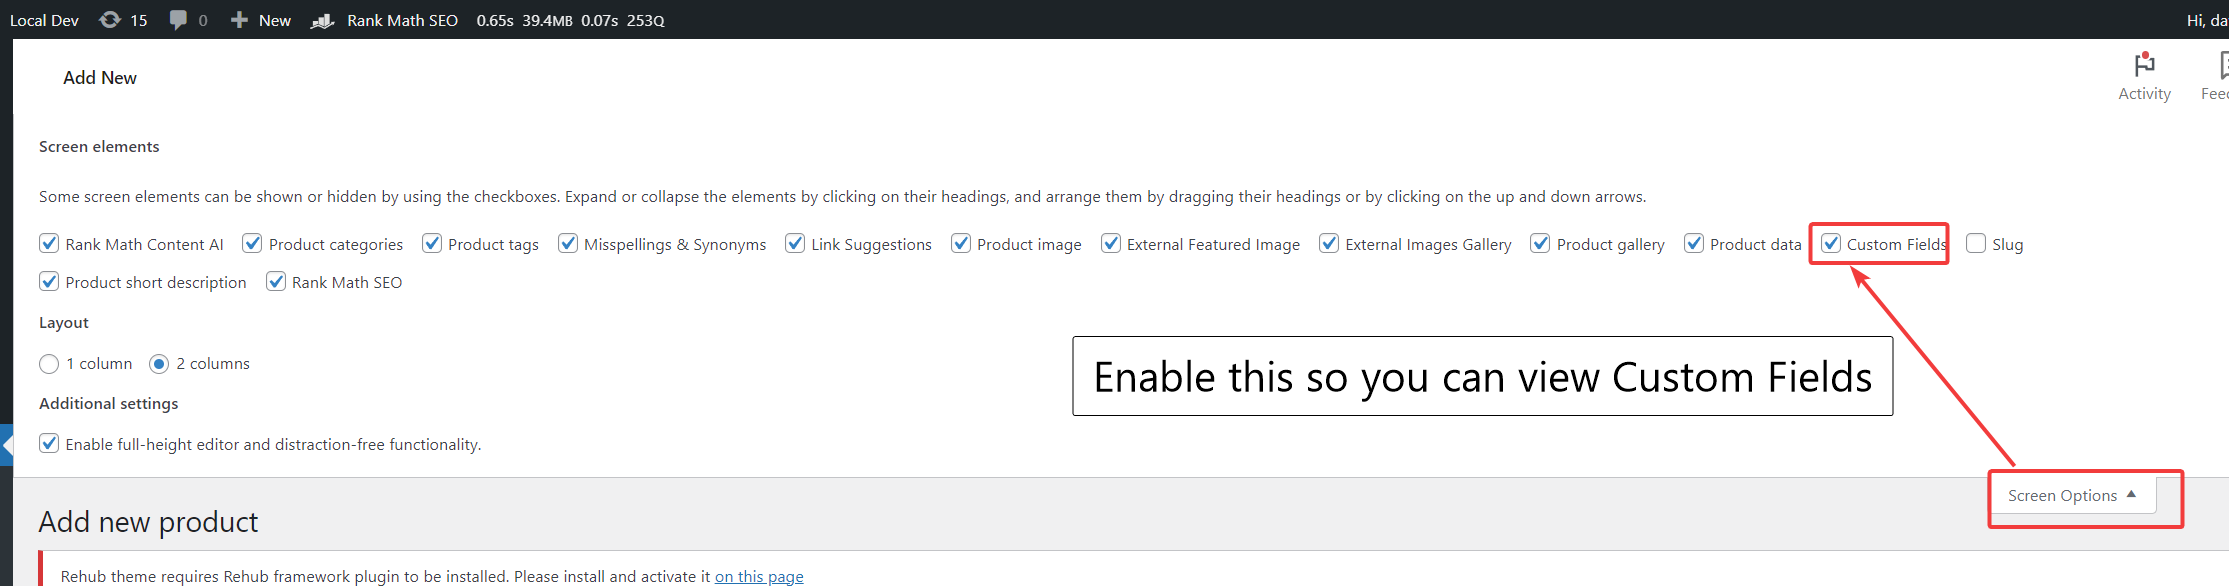
- Enable Custom Fields under Screen Options
- Scroll to Custom Fields and click Add New
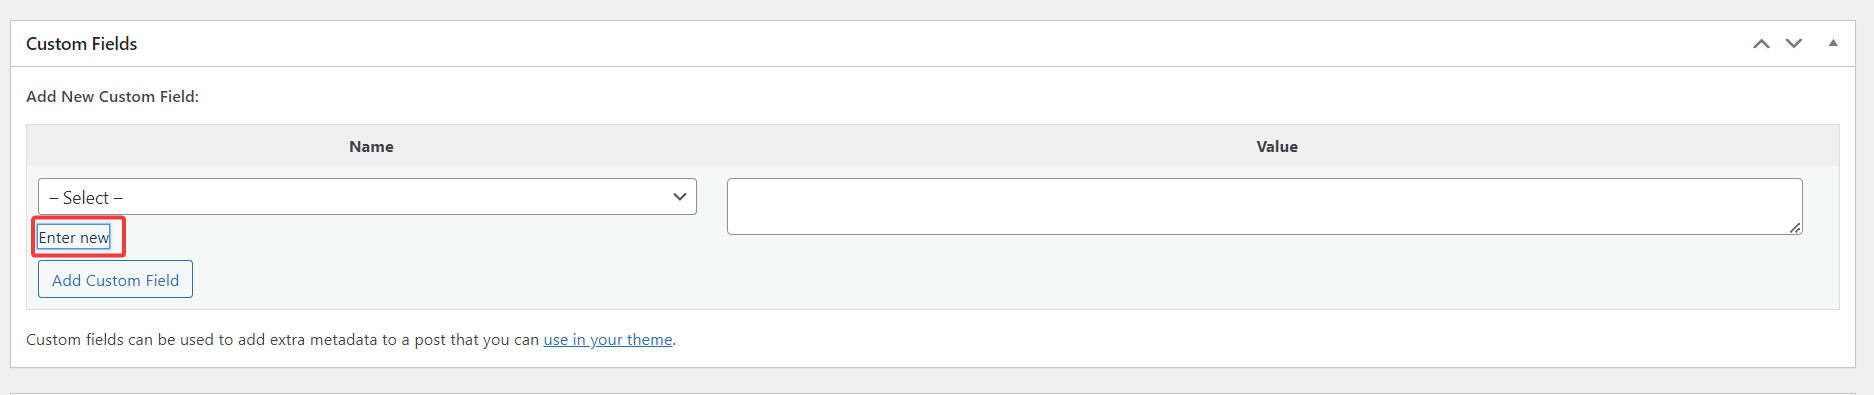
- Enter the first custom field name which is external_image_url, give it a value of ‘x’ (we’re just trying to fool WebToffee) then click Add Custom Field

- Repeat the above for the other 3 fields: external_image_alts, external_image_captions, external_image_titles
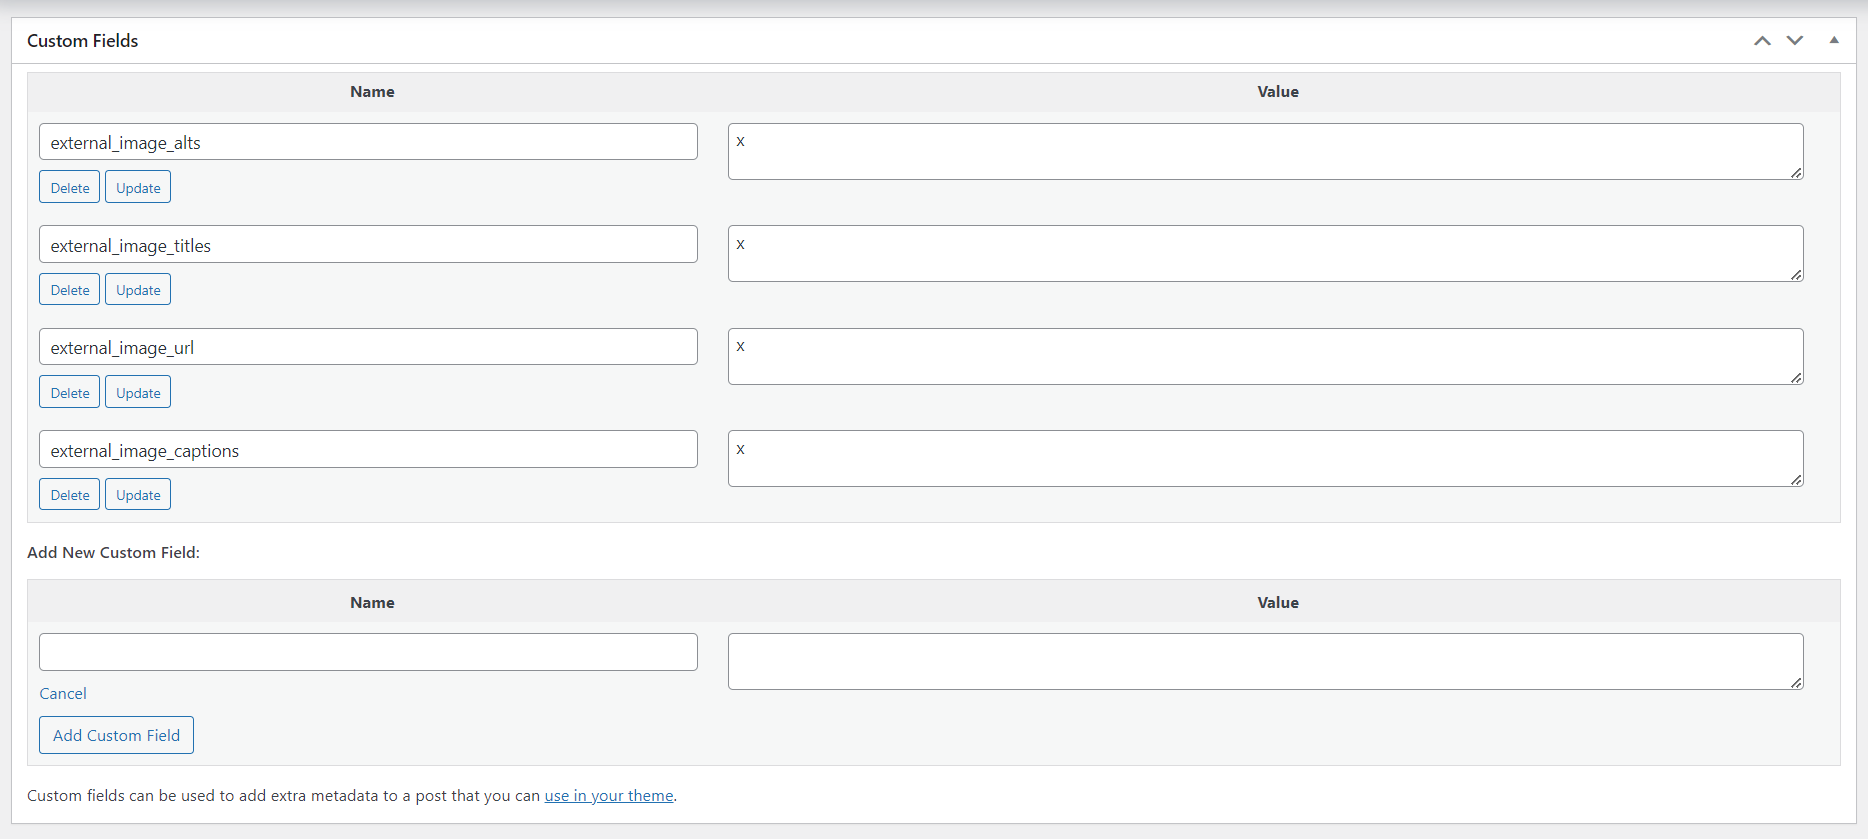
- Save your product
- Now visit WebToffee Importer and Lo and BEHOLD – they have been fooled into letting us use their tool to import!
If anyone is using WebToffee, I would appreciate it if you could nudge them to fix this GLARINGLY bad error. I don’t understand how people can ever import to a new WordPress website with this approach since postmeta will be empty. It’s nuts!


