

There are two widgets in Price Comparison Pro – the standard ‘price comparison’ table that you can add through shortcodes on any page, or on each WooCommerce product detail page. With WooCommerce, that means you need to have each product added along with alternative URLs for each product to populate the price comparison table.
We created the search comparison widget to make things quicker and easier to get started. All you need to do is provide search URLs for your target affiliate sites and the widget will take care of the rest.
There is very little configuration required with the search comparison widget. For example, there is no need to configure CSS or xPath selectors because it’s quite easy to spot the search results on a search page and figure out where the prices and the images are.
Table of Contents
- Displaying the search comparison widget on WooCommerce product detail pages
- Displaying the search comparison widget on other pages
- What is a search URL
- Creating Search Comparison URLs
- Search Comparison Page Options
- Configuring your websites for Search Comparison
- Adding Custom Search Comparison to a single page
Displaying the search comparison widget on WooCommerce product detail pages
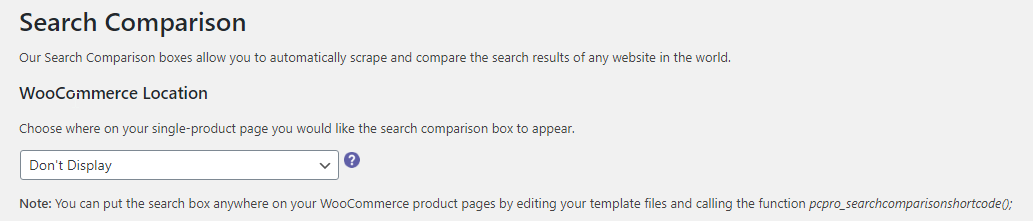
If you are using WooCommerce, you can choose to display the search comparison widget on every product detail page. If you do this, the search string will automatically be entered as the product name and each merchant you have configured will be searched and the results shown in a widget.
This can be useful if you want to show how your prices are cheaper than the competition, or if you want to produce a ‘related products’ widget.
To add the search comparison widget, we have the option to display it in a number of places on your product detail page, or you can completely customising it by editing your WooCommerce product detail template and calling the function pcpro_searchcomparisonshortcode();
Displaying the search comparison widget on other pages
If you’d like to display the search comparison widget elsewhere, we have a shortcode you can call with various configurable parameters.

There are a number of display options (listed in the plugin settings page), you can configure which of your third-party websites you’d like to search, and you can either have a searchform (text input that users can search with) or you can set the productname parameter and the widget will automatically search those third party websites.
What is a search URL
When you configure your websites for use in the search comparison shortcodes or by WooCommerce, you need to configure search URLs for those merchants (just the one time per merchant). The search URLs required by the search comparison widget are any URL that is in your browser after you have performed a search on their site. Here are some examples for ‘BMW’:
- https://www.kijijiautos.ca/cars/bmw/
- https://www.autotrader.ca/cars/bmw/3%20series/on/maple/?rcp=15&rcs=0&srt=3&prx=100&prv=Ontario&loc=L6A0J7&kwd=bmw&hprc=True&wcp=True&sts=New-Used&inMarket=advancedSearch
- https://ca.cargurus.com/Cars/inventorylisting/viewDetailsFilterViewInventoryListing.action?sourceContext=carGurusHomePageModel&newSearchFromOverviewPage=true&inventorySearchWidgetType=AUTO&entitySelectingHelper.selectedEntity=&entitySelectingHelper.selectedEntity2=&zip=N5Y+3J1&distance=50000&searchChanged=true&lostFilters=Text+Search&modelChanged=true&filtersModified=true
- https://www.carpages.ca/used-cars/search/?search_radius=100&province_code=on&city=toronto&ll=43.670791055676407,-79.392554685961685&keyword=bmw
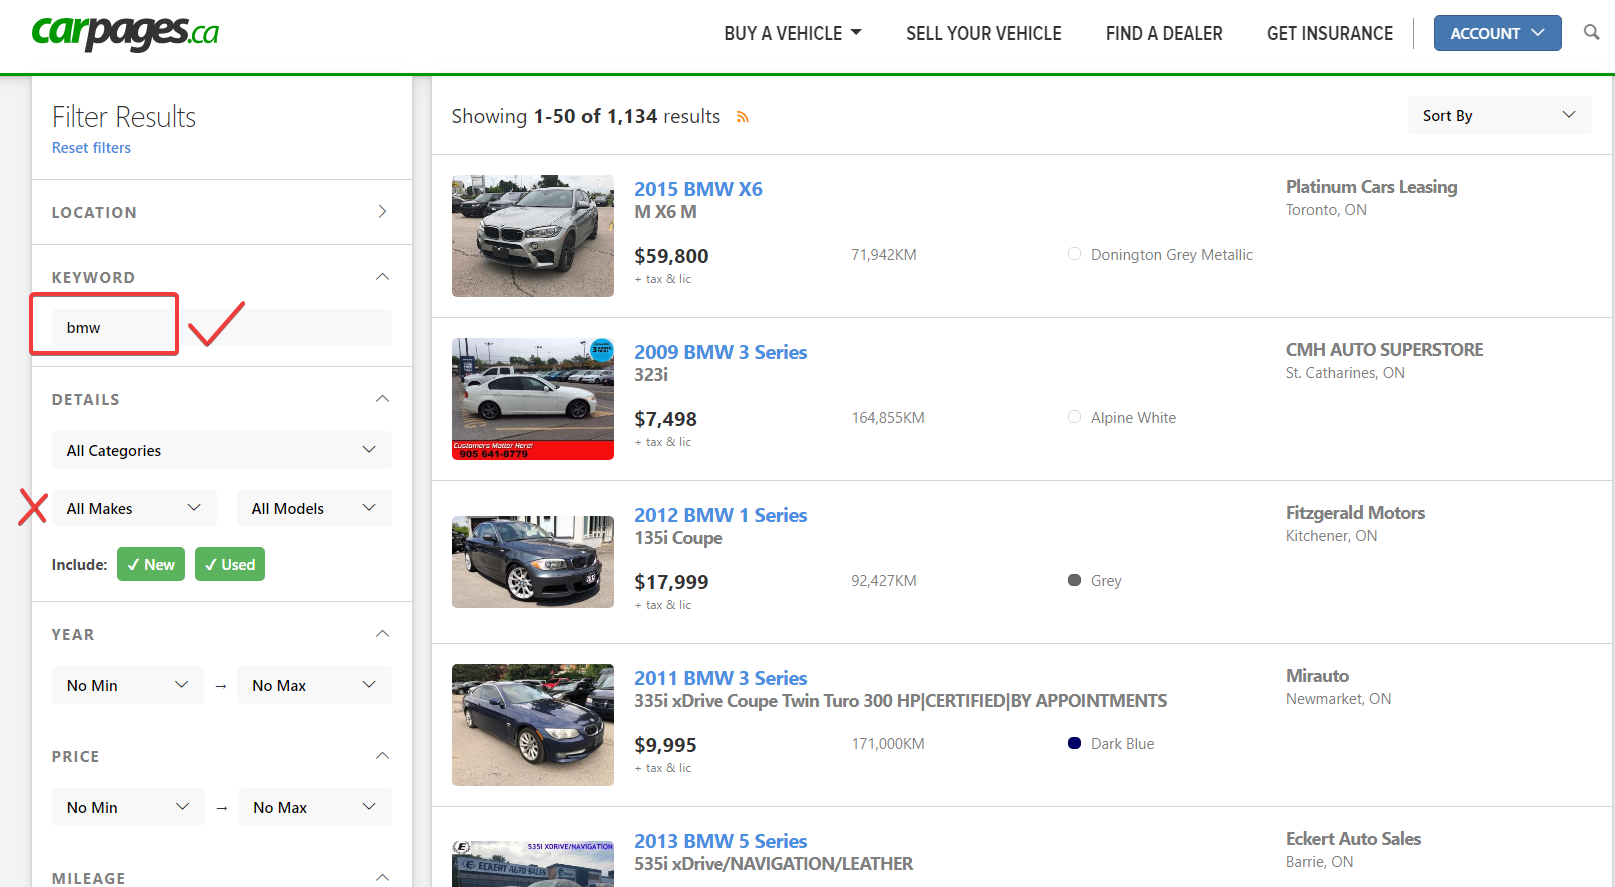
Note: When generating your search URLs, it’s important you use keyword search. That’s the only type of search that the search comparison widget will work with.
For example, see the image below – don’t select the dropdowns for BMW and then expect search comparison to work, unless you are creating a search comparison widget specifically for BMWs and then you want keyword search within all the BMWs.
Creating Search Comparison URLs
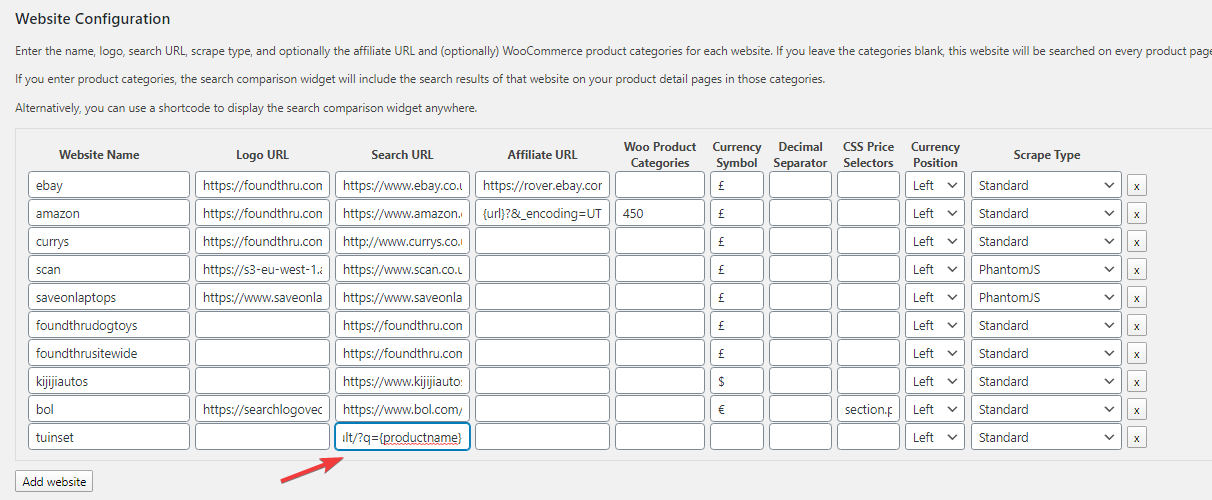
Pick the first site you’d like to allow your customers to search through, visit the site and perform a keyword search. On the next page there will be a URL in your browser containing the keywords you searched for. For example, I searched on www.tuinset.nl for ‘product search’ – it doesn’t matter what you search for just now, you will be replacing this part of the URL. The URL it generates is:
https://www.tuinset.nl/catalogsearch/result/?q=product+search
To change that into a Search Comparison URL, I need to replace what I searched for with the text: {productname}
So, the URL becomes:
https://www.tuinset.nl/catalogsearch/result/?q={productname}
Copy and paste this into the ‘Search URL’ column in Price Comparison Pro -> Search Comparison
Search Comparison Page Options
The first step is to figure out what kind of search comparison you are going to create. Are you creating something that will search ALL of your target websites or are you creating something that only searches ‘dog toys’. This is important, because if – for example – you include a department store in your search results, then you should narrow your search results down to the dog toys category before performing your keyword search to generate your search URL.
With some sites, you will need to perform your keyword search first and then narrow the category to get the correct search URL.
Here’s an example from FoundThru of a site-wide search URL vs a dog-toys restricted search URL (I’m searching for ‘chicken’):
Site-wide: https://foundthru.com/search/chicken/?sssid=8&post_type=product
Dog-toy category specific: https://foundthru.com/product-category/dogs/dog-toys/?s=chicken
Notice how the placement of the search keyword has altered slightly. Which search type you choose depends on your use-case – if you have a site specific to dog toys, it makes sense to use the 2nd version above, if your site allows users to search EVERYTHING from your target sites then the first version is what you need.
Once you have your search URL for your target sites, visit wp-admin -> Price Comparison Pro -> Search Comparison and set up your websites.
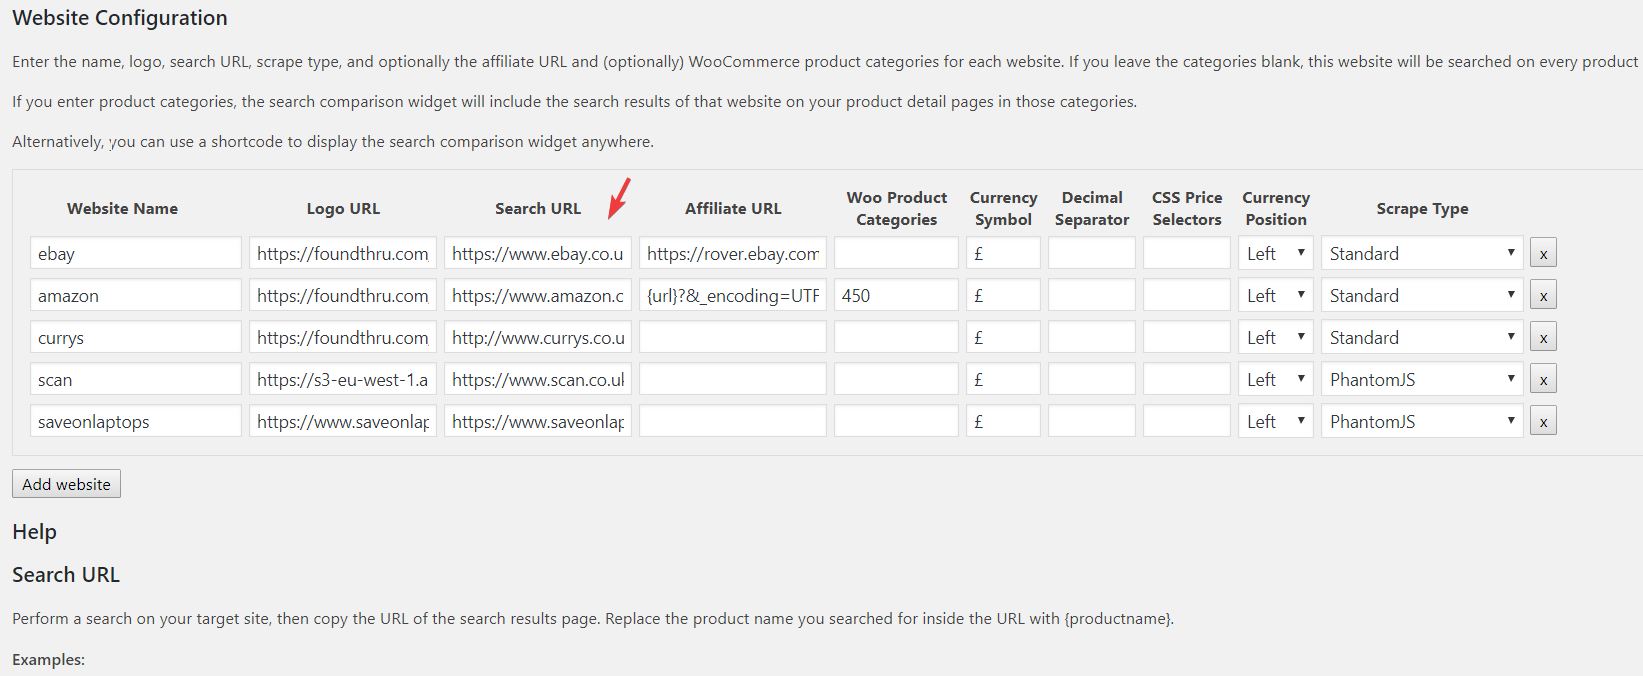
Configuring your websites for Search Comparison
The bare minimum you need are:
- Website name
- Search URL
We’ll cover the others later.
For the search URL, take the URLs you generated earlier and replace the text you searched for with the {productname}. So, using our two examples, they would become:
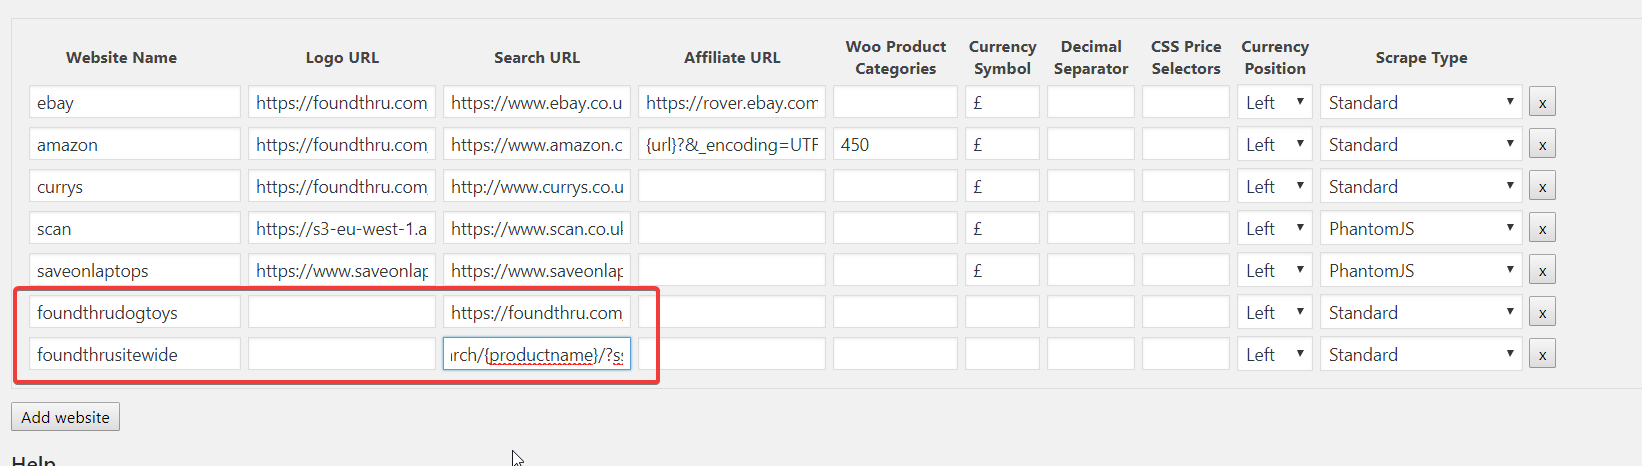
- https://foundthru.com/search/{productname}/?sssid=8&post_type=product
- https://foundthru.com/product-category/dogs/dog-toys/?s={productname}
The search comparison widget automatically figures out if it needs to HTML encode the product name depending on whether it is in a parameter or in the URL.
The Website Name you choose is for your reference only – if you are creating multiple search widgets against a single site inside different categories, then you’ll have to create multiple entries for that site to configure each Search URL. Here’s how it looks when I add the site-wide and the dog-toy-specific search URLs for FoundThru.
Adding Custom Search Comparison to a single page
This option provides a search box for the user and presents the results from all merchants in a grid similar to how WooCommerce behaves.
The search comparison widget has a couple of display options – either full screen, similar to normal searches, or a ‘related products’ widget which can be automatically added to every product-detail page on your site. If it’s added to woocommerce pages, the product name for that product detail page is what will be used for the search.
The full page search shortcode takes this form:
[pcpro_searchcomparison websites=”name1,name2,name3…” display=”searchform” buttontext=”GO” placeholder=”Search…”]
You don’t have to pre-populate the productname – just leave that blank if you wish. So, our dog-toys search would be like this, just searching against 1 site:
[pcpro_searchcomparison websites=”foundthrudogtoys” display=”searchform” buttontext=”GO” placeholder=”Search…”]
So, then when I visit the page where I added this shortcode and search for ‘beef’ I get this page:
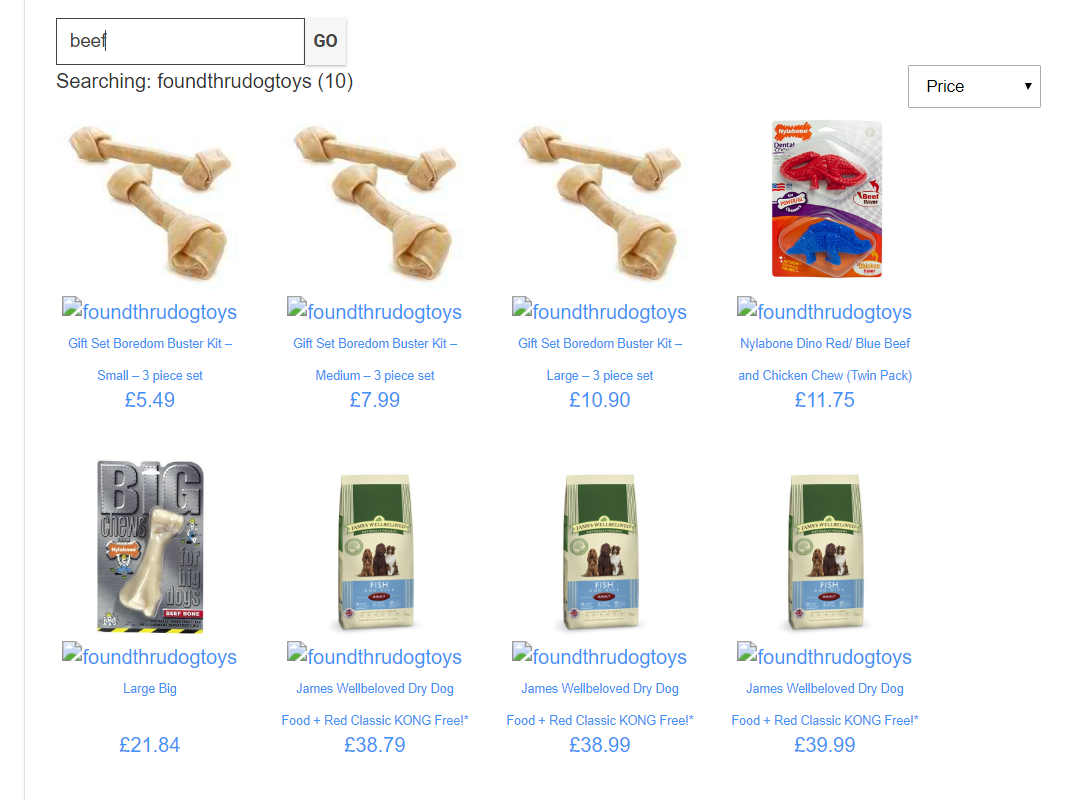
Note: The broken placeholder is where the icon for FoundThru would appear if I’d configured it. I’ll clean this up a little later.


