

External Images includes optional image resizing using the Jetpack Photon service. To use this image resizing, follow these steps:
Table of Contents
Install JetPack
Visit plugins -> add new, and install Jetpack
After installation, click the button to ‘Setup Jetpack’ and then connect your WordPress account.
JetPack is now installed.
Enable image resizing in External Images
Visit Settings -> External Images
Enable the Photon/Jetpack Image Resizing option

Check your theme settings to configure thumbnail sizes
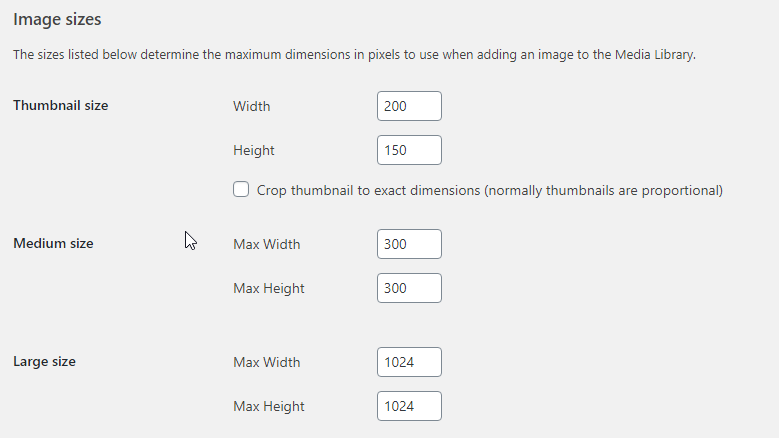
Every theme is different, but if you’re using the Photon image resizing option then External Images will pick up the image size for thumbnails from the relevant part of WordPress. Normally, this would be set in Settings -> Media as per the below image:
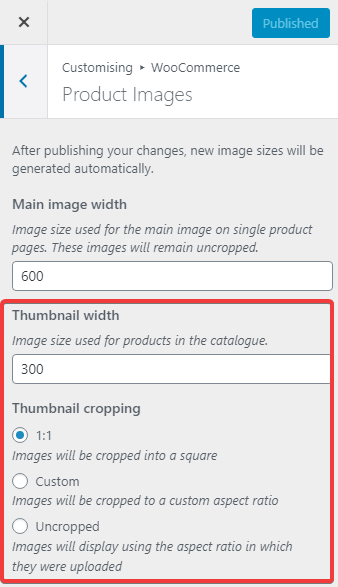
Normally, WooCommerce thumbnail sizes would be configured in Appearance -> Customize -> WooCommerce -> Product Images:
Some themes may have additional thumbnail settings in Theme Options -> WooCommerce or similar to allow you to configure thumbnail sizes.
Test your image sizes
Visit your site where you can see your thumbnails and rick click the images and select Open in New Tab
The URL for your images should begin with https://i1.wp.com/ (or closely similar) which is where the Photon Jetpack image resizing service lives and the image should be the size you have configured for your thumbnails.
Note: When you enable Photon image resizing, CSS image resizing in External Images will be switched off.


